I was a big users of the original power toys that were first introduced for Windows 95. In fact, one of the most popular original power toys called Tweak UI was the inspiration for my first website about tweaking Windows called TweakXP.com. The initial release of PowerToys for Windows 10 includes two utilities for helping you customize your Windows 10 experience and increase your productivity. The first is called FancyZones which is a window layout manager that builds upon the Snap Assist feature in Windows 10. Instead of just a few options and locations to "snap" your windows, FancyZones allows you to define custom layouts. The second utility is a useful keyboard shortcut guide that is available on demand to help identify shortcuts to make your more productive.
Installing PowerToys for Windows 10
The latest version of the Windows 10 PowerToys can be downloaded from the public Microsoft PowerToys repo directly at https://github.com/Microsoft/powertoys/releases. Just click on the release version title and download PowerToysSetup.msi.
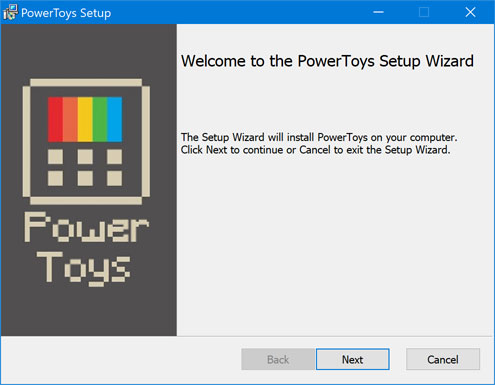
Once downloaded, run PowerToysSetup.msi, hit next and accept the license agreement.
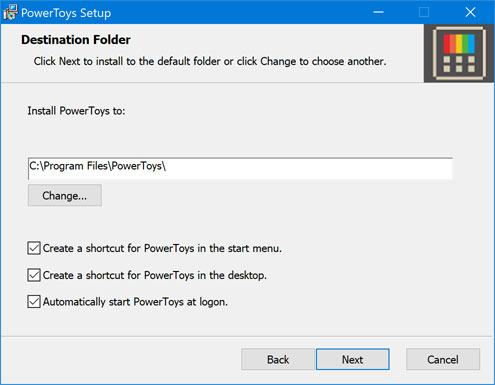
Next, confirm the destination folder and shortcut and startup options before hitting Next. It is important to automatically start PowerToys at logon to take advantage of FancyZones and the shortcut guide.
After PowerToys is installed, ensure Launch PowerToys is checked and hit Finish. You may not see a window pop up upon hitting finish. That is because PowerToys runs in the background and will only display an icon in the system tray by the clock. Click on the icon to open the PowerToys Settings window.

Using FancyZones
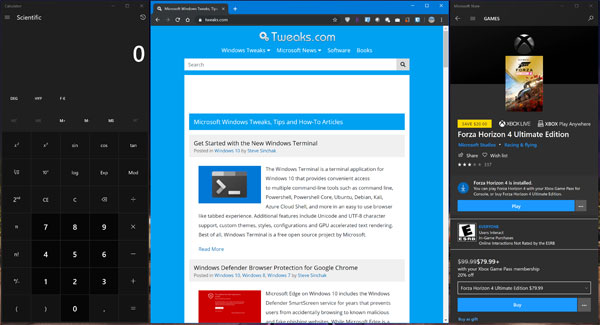
The FancyZones window manager, which is like Snap Assist on steroids, allows you to setup custom windows layouts and easily snap windows into different zones. FancyZones comes with a few defined window layouts that you can snap windows to by grabbing the window and dragging it into a specifc zone while holding down the shift button. The result is a neatly layed out screen with your windows snapped to specific size zones. This is what the three column zone looks like on my setup with calc, chrome and the Microsoft store open snapped to specific zones:
The layout of the zones is fully customizable and can be selected in the FancyZones settings page. Double click on the PowerToys icon in the system tray shown earlier, and click on FancyZones to view the settings:
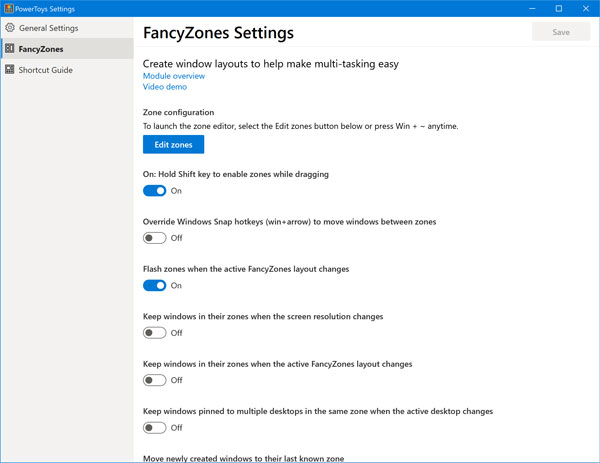
On this screen you can customize the behavior of the utility, such as configuring new windows to auto snap to their last known zone, but for now let's focus on the layout itself so go ahead and hit the Edit Zones button. Alternatively, you can jump directly to the layout editor by hitting the Windows key + the tilda ~ key. On the layout editor you can choose between the five stock layouts.
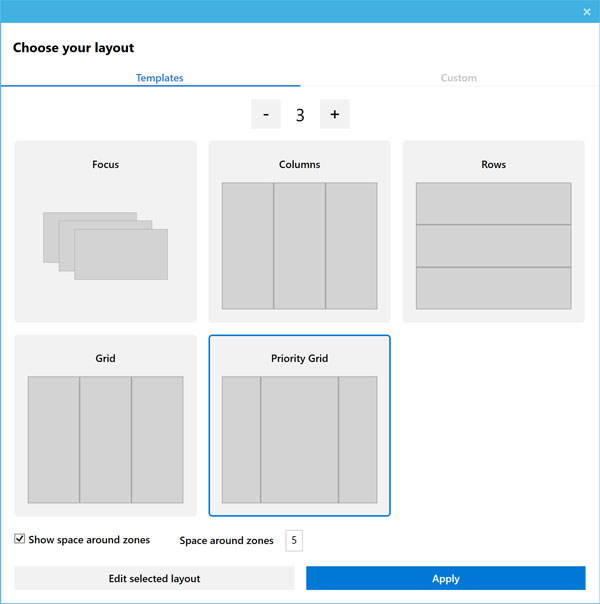
For more advanced zones, you can hit the Edit selected layout button to customize the size of the zones by dragging the blue circles around. You can also divide up zone by clicking anywhere within a zone to divide it at the location of your mouse cursor. For more more details on customizing FancyZones, check out the official tutorial video below.
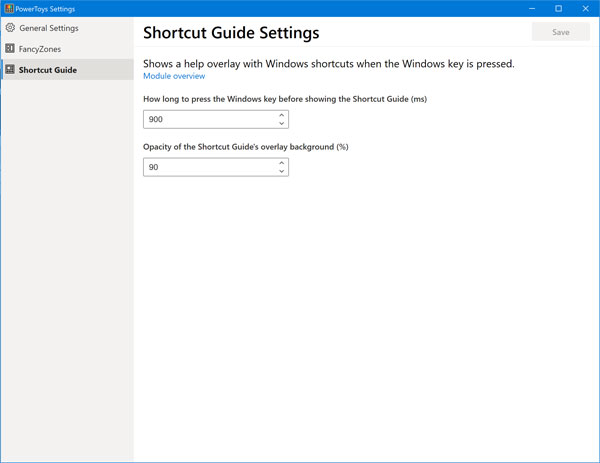
Using Shortcut Guide
The shortcut guide is more of a learning tool than a utility as it simply pops up a list of keyboard shortcuts only for explorer. Perhaps over time this will grow into a more useful utility, I'm hoping the guide will eventually display shortcuts relevant to the active window instead of the same old shortcuts for explorer. However, there is still some usefulness, and it even reminded me of some shortcuts I've forgotten about. To activate, simply hit the Windows key and hold it down until the shortcut guide appears.
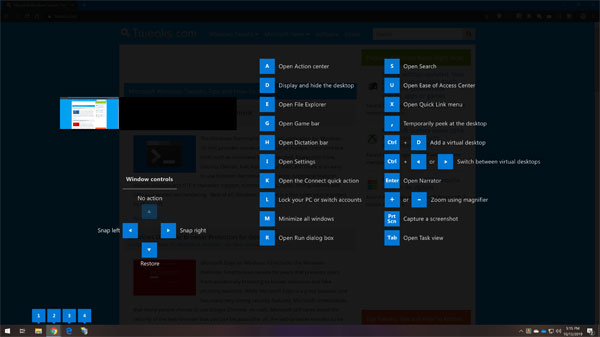
There are only two settings available for the Shortcut Guide, you can adjust how long the delay after hitting the WIndows key before the guide is displayed, and fine tune the opacity of the background to make it more or less transparent.