Every day we use more and more data. I’m talking about all the messages, documents and pictures we create or receive from others. A lot of this data is highly valuable, such as family videos and pictures or even your tax documents. All of this must be stored securely and safely. After all, we don’t want a disk drive issue to result in a loss of this valuable data. So how do we protect it?
If you have a small amount of data cloud services such as OneDrive are perfect for you. But if you have a lot of data, such as hundreds of gigabytes and possibly terabytes, you will likely need a local storage solution. Most people will go out and buy a single disk drive, stick it in their desktop or connect it to a laptop over USB. This works well to store a large amount of data but it has a single point of failure. If that drive dies, so does the valuable data on it.
A better approach is to spread copies of your data across multiple physical disk drives. That is essentially what businesses do to protect their data from the failure of a single drive. Microsoft included a feature called Storage Spaces designed exactly for this purpose. When run in two-way mirror mode, this feature requires two or more drives, but it will automatically spread copies of your data across the drives. The best part is a storage space looks and works just like any ordinary drive on your PC. Once it is setup, the process is completely transparent and your data is better protected.
If your PC has two or more disk drives (separate from the OS drive), then you can setup a two-way mirror storage space by following these steps:
- Click on the Start Button and type in manage storage spaces and hit Enter.
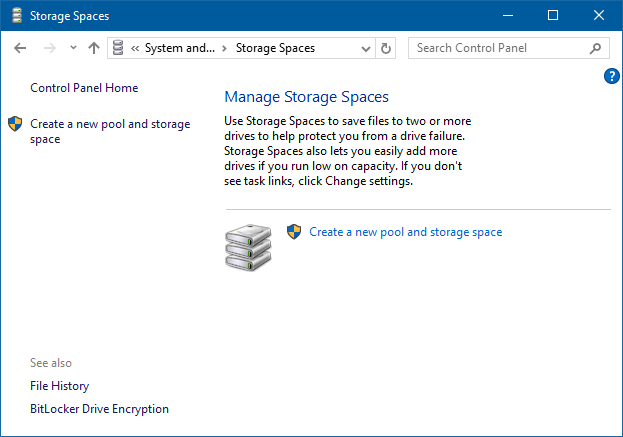
- On the Manage Storage Spaces screen, click Create a new pool and storage space.
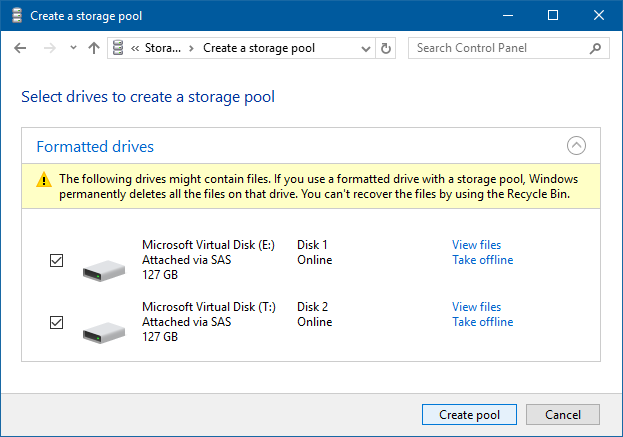
 3. Next you will need to select the disk drives that will make up the storage pool. During the creation process, all data on the selected disks will be permanently deleted, so make sure to select drives that are empty. If you are unsure what is on a drive, click the View files link next to the drive listing. When ready, select the drives by checking the boxes next to each item and click the Create pool
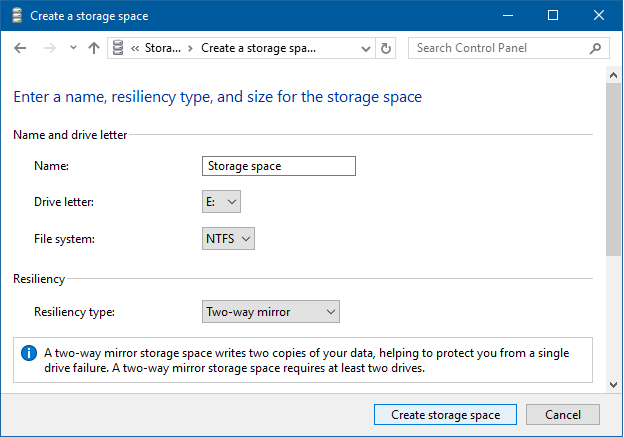
 4. The storage pool will be created, then you will be prompted to create the storage space. This is the virtual drive that will spread your data across multiple disks. Give your storage space a name, confirm the drive letter and file system. Then, make sure the Resiliency type is set to Two-way mirror. Finally, click Create storage space.
Your storage space has been created. You will now see the storage pool and storage space on the Manage storage spaces screen. The storage pool will show the total capacity of all drives added in the pool. I added two 126 GB drives to my pool, so my pool capacity is 252 GB. However, since I created a “mirrored” storage space, that stores a copy of each file on both underlying physical disks, the capacity of my storage space is about half of the pool capacity.
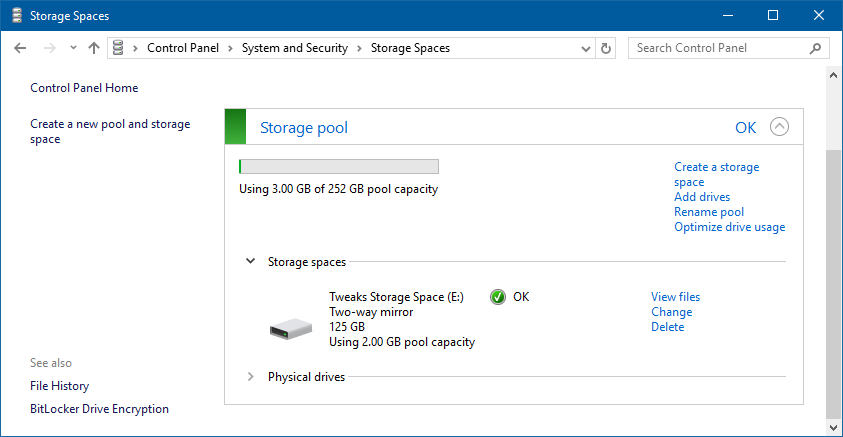
Once a storage pool and storage space is created, you can add and remove drives down the road. Simply use the Add drives option on the Manage storage spaces screen. In order to remove a drive from a two-way mirror storage space like we created above, you will need to add a third drive to the space before you can remove one since a two-way mirror must always have a minimum of two disks.
