This sounds like an April fool’s day joke, but I am going to show you how to run Bash and other Linux apps on Windows 10 using a hidden feature in the Windows 10 Anniversary release (version 1607). Running Linux on Windows has been possible for a long time with virtualization software, but with the new “Windows Subsystem for Linux” Ubuntu Linux binaries can run directly on Windows without the need for the Linux Kernel running in a VM.
The Windows Subsystem for Linux makes this all possible by providing emulation-like translation of Linux kernel system calls to the Windows kernel. So when a Linux app like Bash executes and makes system calls, the Windows Subsystem for Linux translates those calls into Windows system calls and Bash executes just like on Linux. According to Dustin Kirkland @ Ubuntu, the translation is very fast and does not impact application performance.
Now that we have a special translation layer that can run Linux apps on Windows, we need some Linux Apps. That is where the Ubuntu on Windows app is very helpful and comes installed with the Windows Subsystem for Linux. The Ubuntu on Windows app includes all of the popular user space apps found on Linux. That includes Bash, SSH, APT, and much more. In addition, with the package manager APT you can install just about any Linux package including apache, mysql, python, ruby, php, etc. Running sudo apt-get install python on Windows feels wrong but it works perfectly.
In order to turn on this awesome new feature and Ubuntu on Windows app you must have the Windows 10 “Anniversary” release version 1607 or any Windows Insider build number 14393 or newer. Follow these steps when you have a compatible version of Windows 10:
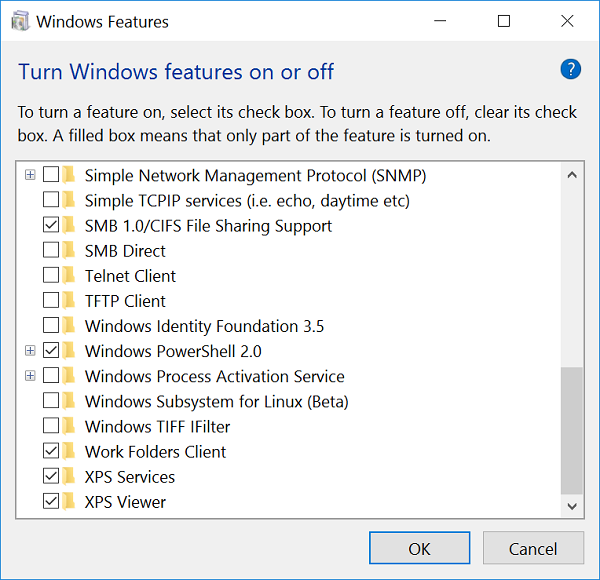
- Click on the Start Button, type in Turn Windows features on or off and then hit Enter.
- Scroll to the bottom of the list and check Windows Subsystem for Linux and then hit OK.
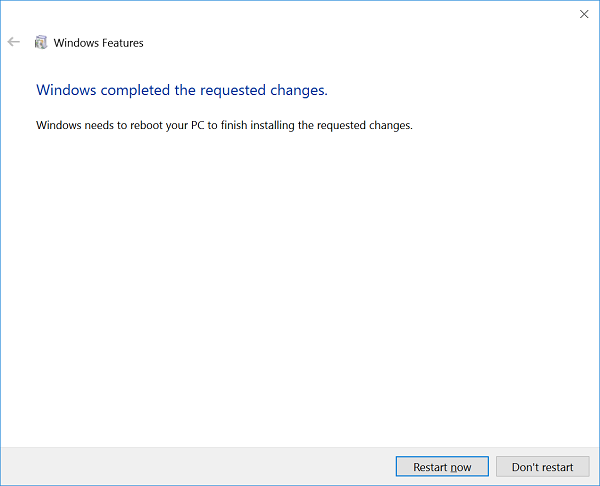
 3. Windows will need to reboot to complete the install. Hit Restart Now.
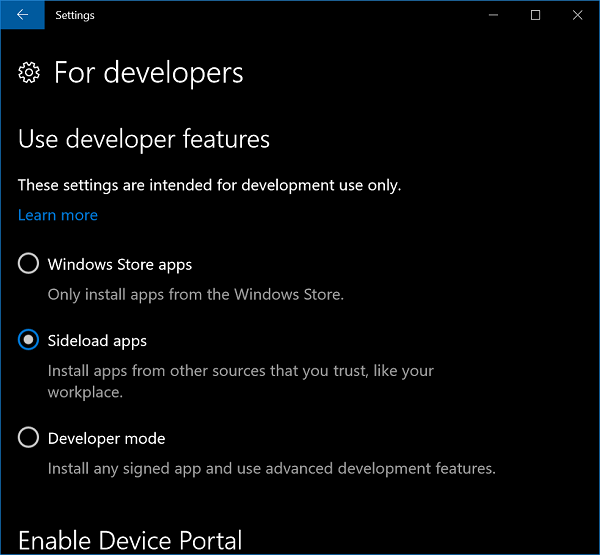
 4. After your PC has restarted, click on the Start Button, type in for developers settings and hit Enter.
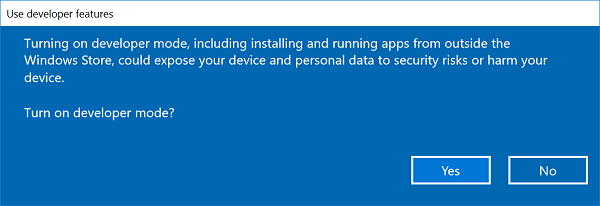
5. Under Use Developer Tools, select Developer Mode to turn it on.
 6. Hit Yes on the confirmation screen.
 7. Finally, we are ready to install the Ubuntu on Windows app. Click on the Start Button again and type in cmd and hit Enter.
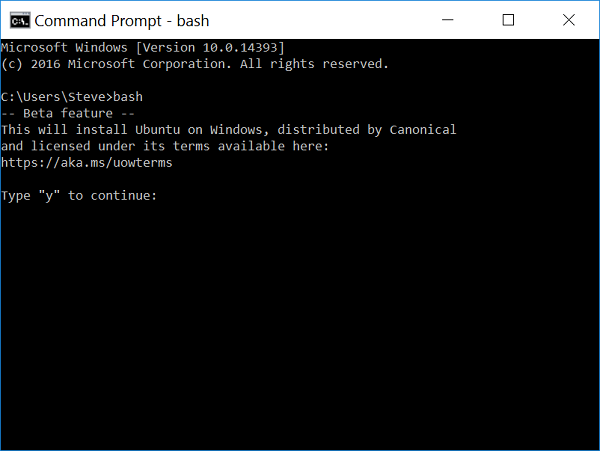
8. When Command Prompt loads, type in bash and hit Enter.
9. You will be prompted to install Ubuntu on Windows from the Windows App Store. Type in y and hit Enter to install.
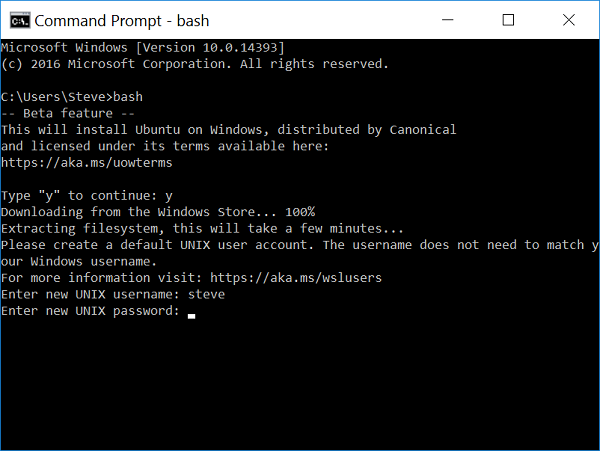
 10. After Ubuntu on Windows is installed, you will be prompted to setup the root account (equivalent to Windows administrator account). This account is different than your Windows account and can be whatever you want. Enter in a username, hit Enter. Do the same to setup a password.
Ubuntu on Windows is now ready to use. Just hit the Start Button, type in Bash on Ubuntu on Windows to get started.
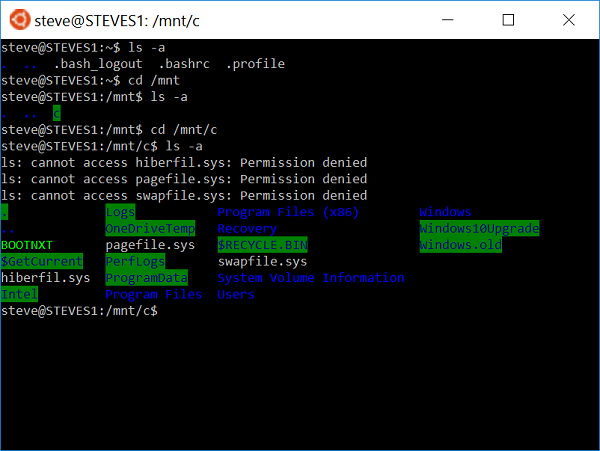
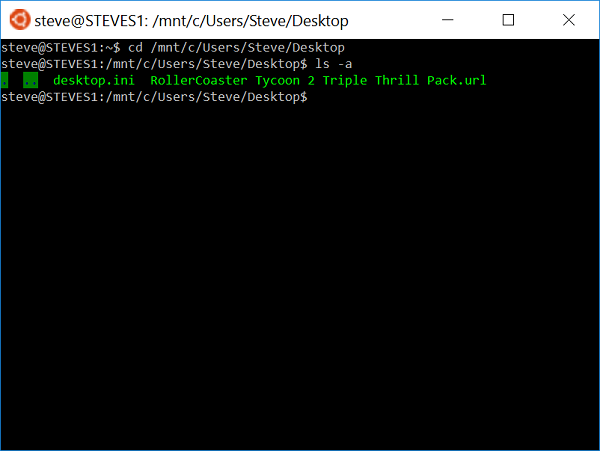
Tip: If you need to access files stored on any of your hard drives you can find them mounted in the /mnt folder under the Windows drive letter. To get to my desktop I type in cd /mnt/c/Users/Steve/Desktop and then hit Enter. Keep in mind Linux is case sensitive so you will need to use the proper folder names with capitalization.
