The classic System Restore feature that allows you to easily jump back in time to undo system changes is mysteriously disabled in Windows 10. It is not yet clear if this is the intended behavior, but if you end up in a situation where an app install, driver update or other type of update causes a problem, System Restore can be a life saver. Rather than reset your PC to a clean install state, just revert the most recent system change with System Restore.
Enabling System Restore requires just a few simple steps:
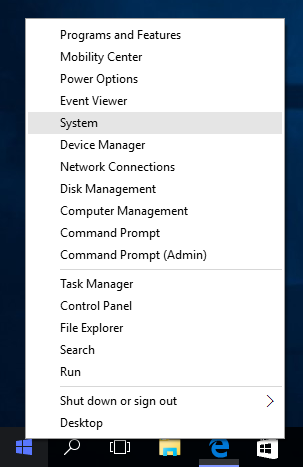
- Right click on the Start Button and select System.
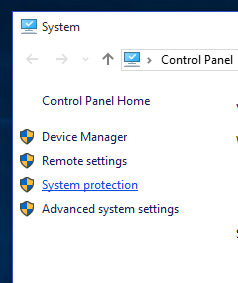
- Click on System Protection.
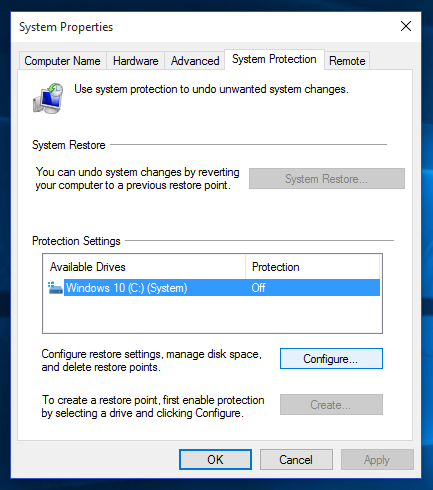
- Under Protection Settings, select your primary drive and click the Configure button.
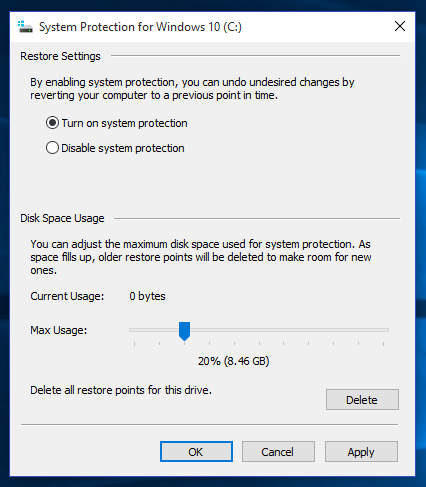
- Select Turn on system protection and then adjust the Max Usage percentage to something above zero. I like to set mine to 10%.
- Click OK and System Restore has been enabled.
For more information on System Restore, check out Safe tweaking with System Restore.
I recently upgraded my home network from gigabit to 10G so I could take advantage of faster transfers between my Synology NAS, Proxmox server, and workstations. But while editing family video clips stored on my NAS, something did not feel right. Every device was connected at 10GbE, but file copy speeds were slower than expected. This made me wonder, are there bottlenecks in my network?
Read More

With remote work the new standard, having a fast and quality Internet connection and WiFi has become as important as reliable electricity. And if you work in IT support, confirming an end user's home internet, internal network, and WiFi is healthy without errors is the first step of troubleshooting any slowness or video conferencing issue with Zoom, Webex or Teams.
Read More
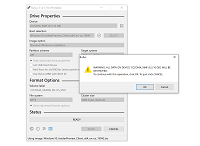
I've written about a few methods over the years to create a bootable USB flash drive from a Windows 10 ISO file. But recently I switched to using a new tool called Rufus that is both reliable at successfully creating bootable media and automating many steps to quickly get the job done so you can perform a clean install. This is very helpful when performing a clean install of the [Windows 10 20H2...
Read More

The latest update to Windows 10 known officially as the October 2020 update and 20H2 is ready for use and has begun rolling out. The final build number of the 20H2 update is 19042 with minor revisions rolling out along with normal security updates via Windows Update. At this time the new build is available to testers before Microsoft pushes it to millions of users in the weeks ahead. Check out the...
Read More