This is a tutorial on how to setup and use AVG 7.0 FREE for maximum protection. First you must download it from [b][url=http://free.grisoft.com/freeweb.php/doc/1/lng/us/tpl/v5]HERE[/url][/b]. Once you have downloaded it just double click on the file to install it (it is not necessary to uninstall AVG 6.0 FREE prior to installing 7.0 FREE, 7.0 FREE will automatically uninstall the older version during the install). During the install you will be prompted for the “standard” install or “custom” install, choose the “standard” install. Once it has installed the program itself will start and you will be prompted with a few options for configuration. The first screen will say “Congratulations”, on this screen choose “next”. The next screen will prompt you to update your virus definitions, I suggest doing so now. You will then be prompted to make Rescue Disks, personally I don’t choose this option, so just choose “next”. Then you will be prompted to configure your email scanner, select the option "Configure E-mail Scanner" a box will open and select "ok". The next screen will prompt you to run a Computer Scan now, I recommend waiting until you configure everything properly, so just choose “next” again. You will now be prompted to Register your version, I suggest doing this so that you may have access to their Forum for Tech Support. Now you are into the main screen for AVG’s Test Center, here is where we will start configuring things. From the toolbar select the option “Tests” -> “Complete Test Settings”. Under “Scanning progress” check both boxes, under “Scanning properties” check all of the boxes and under” File extensions” select “Scan all files” then select “ok”. Now select “Tests” -> “Selected Areas Test Settings”. Under “Scanning progress” check both boxes, under “Scanning properties” check all of the boxes and under” File extensions” select “Scan all files” then select “ok”. Now select the “Scheduler” button and select the option “Test plan in Basic mode” then “Edit selection” and choose a time that you will not be using your pc such as 2:00AM then “ok”. Now select the option “Update plan in Basic mode” then “Edit selection” and choose a time that you will not be using your pc such as 2:00AM then “ok”. Now select the “Control Center” button. Under here select the “AVG Resident Shield” button, under the “properties” tab check all of the boxes [b]except[/b] “On-close scanning” and “Turn off scanning files without extension” then “ok”. Now select the “E-Mail Scanner” button, in the installed plugins box you should see either “AVG MS Outlook Extension” if you are using Outlook for your email client. If you are using any other email client you should see “Personal Email Scanner”. Now select “configure” and under the “E-Mail scanning” section check the boxes “Check incoming mail”, “Check outgoing mail” and both boxes for “Certify mail”. Under “Scanning properties” check all three boxes and under “Attachment filter” check “Use heuristic e-mail message filter then “ok” twice. Now select the “Shell extension” box -> settings, under “Scanning progress” check both boxes, under “Scanning properties” check all of the boxes and under “File extensions” select “scan all files” then “ok”. That’s it, now AVG is setup properly for the best protection. [color=red][b]Also, if you think you are infected with a virus then first disable System Restore in Windows XP then do a full system scan. This is because viruses can get stuck in a restore point and the only way to remove them is to disable System Restore which thereby deletes all of your old restore points.[/b][/color] Sometimes AVG cannot move the virus to the virus vault or properly delete it, in such a case you should open the test results and see where the virus in question is located on your pc and manually remove it, it is a good idea to do this in safe mode. The reason for this is because AVG is excellent as detecting malicious code but sometimes what it recognizes is actually spyware that is doing "trojan-like" activity so AVG detects it as a trojan. Since it isn't actually a trojan that AVG has a definition for it cannot properly remove it so you must do this manually. To manually remove a file do the following: First try renaming the file extension, for example if it is a dll file rename the .dll extension to .txt then try deleting it. If that does not work then you need to "take ownership" of the file/folder and then you can delete it. First I suggest making a new folder and moving the file into this folder. Then read [b][url=http://support.microsoft.com/?kbid=308421]How to take ownership of a folder in Windows XP[/url][/b]. Once you follow the instructions in that link you will be able to right click on the file/folder and delete it.
Setting Up & Using AVG 6.0 FREE
Related Posts

If you own a Google Chromecast streaming device, you can easily share a browser tab in Chrome browser or even your entire desktop. This can be very useful when presenting from your laptop or if you just want to watch something on a big screen that is only on your PC. The only requirement is you must be on the same network as your Chromecast...
Read More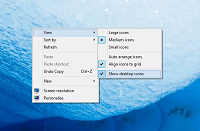
If you are a fan of minimalist desktop experiences, hiding the desktop icons are an easy way to clean up the Windows interface. Instead of saving everything to your desktop, use the default profile folders such as downloads and documents. Actually hiding all the icons on your desktop is a very simple customization hidden in the right-click context menu. Just right-click on the desktop, select View...
Read More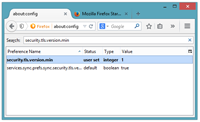
Google security researchers have published details about a major security flaw found in the SSL protocol that is used to encrypt data transferred between your browser and a web server. SSL is typically used in situations where logon credentials are validated...
Read More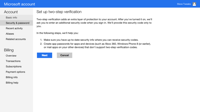
Enabling two-factor authentication is a great way to add an additional level of protection to your Microsoft account. Even if your password is stolen, your account is still protected because two-factor authetication requires an additional level of verification to log in. Microsoft calls their version of two-factor authentication "two-step verification" and it works by providing you with a random code...
Read More