I recently helped migrate an Office 365 contact list over to the Apple Contacts ecosystem. While there are a lot of off-the-shelf products you can buy, I approached this as a project to build a free CSV to vCard (VCF) conversion tool (built right into this page) that would help anyone else in a similar situation without having to buy or install anything.
There are multiple ways to approach this, but the most universal, which works on both Windows and Macs and without installing any software, is to leverage Outlook Web to export the contact data to a CSV file, convert the CSV file to the vCard / VCF (Virtual Contact File) format (using the free tool built into this page), and then import the file on the Apple iCloud Contacts web app.
Alternatively, if you have access to a Mac, I will provide an additional method that will not be as easy, and require more work on your part, but may provide more flexibility if you do not like some of the implementation decisions I took in my automated approach which covers 99.9% of the most common contact fields, but not 100% of the vCard optional fields.
Option 1: Automated Outlook Contact CSV to Apple Contacts vCard Converter
Using a combination of JavaScript components (CSV Parser & File Download) and my custom vCard creation function, this automated approach will convert the most common contact fields exported from Outlook:
- First Name
- Middle Name
- Last Name
- Nickname
- Title
- Email
- Email 2
- Email 3
- Home Phone
- Home Phone 2
- Work Phone
- Work Phone 2
- Mobile Phone
- Other Phone
- Company Phone
- Job Title
- Company Name
- Home Address Street
- Home Address City
- Home Address State
- Home Address Zip/Postal Code
- Home Address Country/Region
- Work/Biz Address Street
- Work/Biz Address City
- Work/Biz Address State
- Work/Biz Address Zip/Postal Code
- Work/Biz Address Country/Region
To get started, follow these steps:
- Log into Outlook Web People (formerly called Contacts).
- On the right side of the menu, select
Manage contactsand thenExport contacts.
- Ensure
All contactsare selected and hitExport.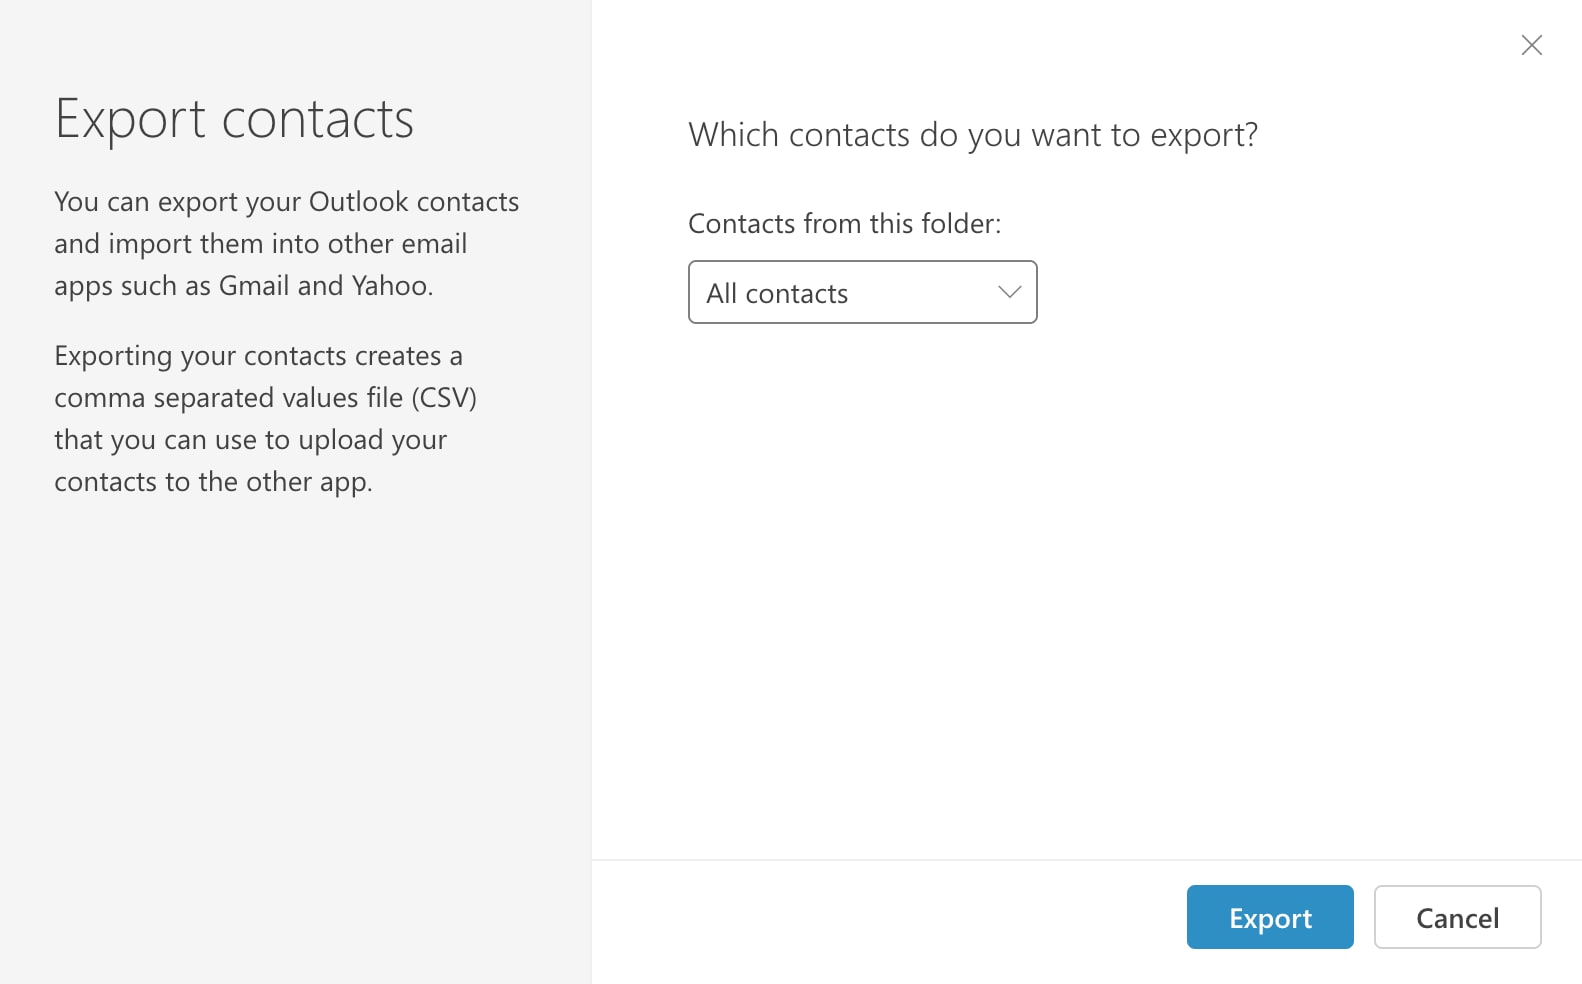 .
. - A file should have auto-downloaded, open it up in your favorite text editor if you would like to validate the format, matches this format exactly:
First Name,Middle Name,Last Name,Title,Suffix,Nickname,Given Yomi,Surname Yomi,E-mail Address,E-mail 2 Address,E-mail 3 Address,Home Phone,Home Phone 2,Business Phone,Business Phone 2,Mobile Phone,Car Phone,Other Phone,Primary Phone,Pager,Business Fax,Home Fax,Other Fax,Company Main Phone,Callback,Radio Phone,Telex,TTY/TDD Phone,IMAddress,Job Title,Department,Company,Office Location,Manager's Name,Assistant's Name,Assistant's Phone,Company Yomi,Business Street,Business City,Business State,Business Postal Code,Business Country/Region,Home Street,Home City,Home State,Home Postal Code,Home Country/Region,Other Street,Other City,Other State,Other Postal Code,Other Country/Region,Personal Web Page,Spouse,Schools,Hobby,Location,Web Page,Birthday,Anniversary,Notes. This is the latest export schema that Microsoft is using for the contact export at the time of publishing. If your file does not match this format, please reach out so I can update this tool. - Now it's time to upload your Office 365 exported CSV File. Click the
Load CSVbutton, and select the CSV file you downloaded earlier. - Verify the correct CSV file was loaded. If not, repeat step 5.
- Upon successfully loading the CSV file in step 5, the CSV file will automatically be converted. This is your opportunity to scroll through the converted file and make any minor tweaks to the data. Be careful not to affect the specific vCard formatting which was generated according to the standard.
- When ready:
- We now have our data in the correct format and it's time to upload it to Apple Contacts via the iCloud website. Head over to https://www.icloud.com/contacts/ and sign in.
- Click on the blue plus + icon and select Import Contacts.
- Select your download vCard VCF file from step 8 and click Open / OK. At this point, it may look like iCloud Contacts is doing nothing as there is no confirmation. Just give it a few minutes and then your contacts will magically pop in and begin to synchronize to all your Apple devices.
Option 2: Manual Outlook Contact CSV to Apple Contacts import using the Contacts MacOS app
If you own a Mac, option 2 can provide you with more control over the field mapping and additional fields that are not very common. This approach starts off the same as Option 1 for the export, but then you must manually map each filed using the import capability of the macOS Contacts app.
- Log into Outlook Web People (formerly called Contacts).
- On the right side of the menu, select
Manage contactsand thenExport contacts. - Ensure
All contactsare selected and hitExport.. The file should auto-download. - Open up
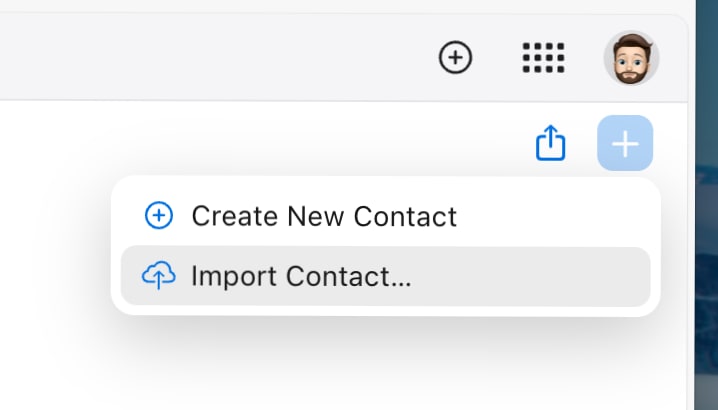
Contacts.appon macOS either with, Spotlight, Finder, or by clicking here. - On the menubar, click on
Fileand selectImport(alternative use keyboard shortcut ⌘ + o). - Select your extracted CSV file from step 3 and hit Open. If you get the
Text file import failureerror, you may need to manually clean up the text file in any text editor. Alternatively, you can use the automated approach (option 1 above) that features a more forgiving CSV parser.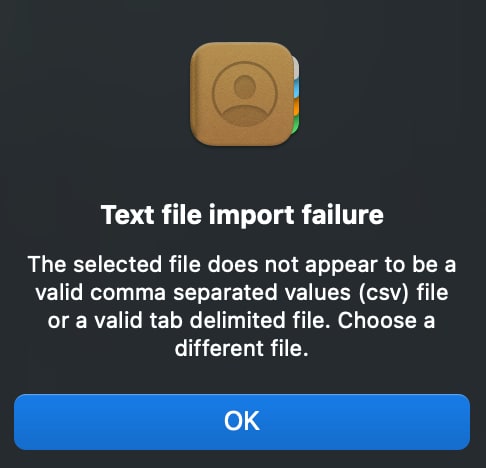
- Next, slowly work your way down the list selecting the proper mapping for each field on the right. In my case, some fields auto-mapped, but most were wrong or set to
Do not importand needed to be corrected.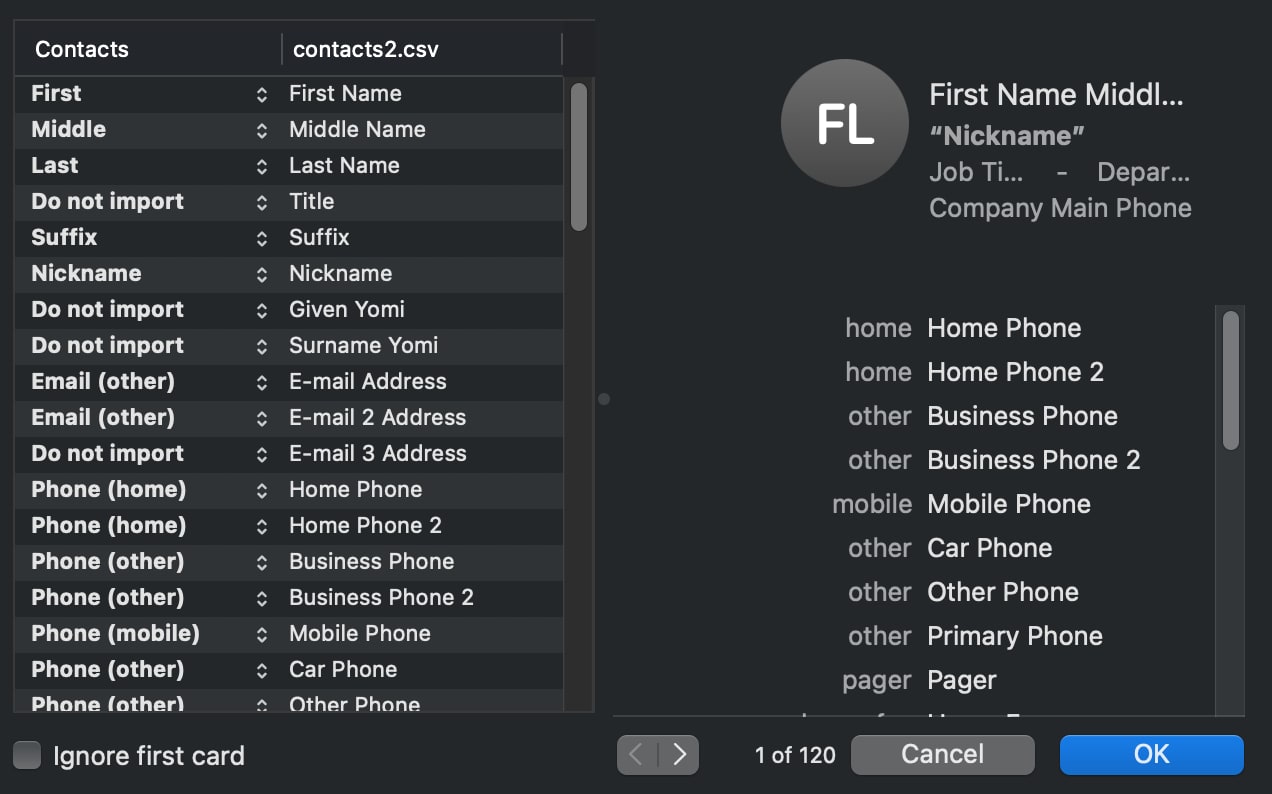
- When done, hit OK to start the import. (Tip: You may want to check the "Ignore first card" checkbox so a contact is not created for the field headings in the CSV file. However, I did notice the UI sometimes is bugged when this feature is used and hides the Cancel and OK buttons. If that happens to you, just delete the junk contact created for the header row later.)