
The Github Copilot AI service is a great tool for developers that can assist with code generation, code completion, refactoring, debugging, generating test cases, and much more. However, as a public cloud AI service, many developers cannot access Copilot due to their company policies or budget constraints. Thanks to modern hardware, it is now possible to run AI models locally on your machine using free open-source software. This allows you to take advantage of the powerful features of Copilot without having to rely on a public cloud service and avoid all cost and privacy concerns.
Best of all, if you are a developer constrained by corporate governance, risk, and compliance policies that are struggling to keep up with the new AI era, local large language models (LLMs) are a great way to get started with AI-powered development tools. This reminds me of the early days of the public cloud where we first built the "private cloud" on-premise. This allowed the GRC groups to become educated and comfortable with the new concepts while the rest of the organization could begin taking advantage of the benefits in parallel in safer sandbox.
In this article, I will show you how to download and set up local AI LLMs using free open-source software like Ollama, and leverage them in VS Code for code completion and chat with the Continue.dev extension.
Hardware Requirements
Running any LLM locally with a decent response time, often measured in tokens per second, can require powerful hardware and a lot of RAM depending on the size of the model you would like to run. Often GPUs (e.g. NVIDIA 4090) are used to accelerate the performance, but that can be difficult as most developers have laptops with integrated GPUs.
Recent Apple computers like the MacBook, Mac Studio, or Mac Mini with the "M" (Apple Silicon) processors and at least 16 GB of RAM are sufficient to run medium-sized LLMs with reasonable performance and responsiveness for AI-aided development. These devices have powerful integrated GPUs and dynamically allocated GPU memory that can handle the workload efficiently.
I also tested Intel devices with integrated GPUs or CPU only mode, which do work, but the performance is terrible and I do not recommend it for anything but playing around with models. For comparison, the same prompt on an identical 3 billion parameter model responds in about 3 seconds on my device with an Apple M2 Pro chip compared to 4 minutes on my older Intel i7 desktop.
For this guide, you will need an Apple device with at least a M1 chip or newer (strongly recommend M2 + Pro, Max, Ultra variants), and at least 16 GB of RAM to fit both the model, that must be loaded into RAM, and the rest of your development tools.
How to choose which LLM to use?
For AI-aided development, two models are typically used. One model for code completion and another model for chat and generation tasks based on prompts. Since the models can be quite large and consume a lot of memory just to have them loaded, I like to run one model for both, which works quite well for some models.
Determining what model to run can be an overwhelming task with the rapid innovation leading to frequent model releases. When you finally decide which model you want to use, you then need to select a specific variant as some models can have over a hundred variants.
The model variants can look very cryptic. For example, qwen2.5-coder is a variant of the Qwen 2.5 model that is optimized for code completion tasks. The -coder suffix indicates that this variant is designed to handle code-related tasks. There are then sub-variants of the -coder variant, such as the base and the instruct versions. The base version is the default variant and it is optimized for general tasks. The instruct version is designed to handle instruction-based tasks, such as generating code or answering questions based on prompts.
Model Size
Going further down the rabbit hole, you will find that there are different size variants of the models. For example, the qwen2.5-coder is typically a 32b model, which means it has 32 billion parameters. Generally, the more parameters, the better, as it's "brain" is larger, but it also requires 20GB of disk space and RAM, along with more computational power, so it is too big to be run locally on most systems.
Thankfully, there are smaller variants available that are optimized for running on local systems. For example, the qwen2.5-coder-14b is a 14b model, which means it has 14 billion parameters. This version is typically smaller and faster to run locally than the 32b version. There is also 7b, 3b, 1.5b and .5b versions available as well. The smaller you go, the faster you will get a response, but at the cost of lower quality results as its ability to reason and understand complex information reduces with size.
Numerical Precision and Quantization, oh my!
Some models may have variants labeled fp16, q2_K, or q5_0. These labels, of which there are a lot, indicate different numerical precision and quantization techniques that have a direct correlation between the model accuracy, memory required, and speed. fp16 is a 16-bit floating point (numerical precision) format, q2_K and q5_0 are quantization formats that reduce the number of bits used to store the weights resulting in a smaller size and faster model but at the cost of accuracy.
Quantization, at its most basic level, is a math concept you are already very familiar with. I know you were taught it in elementary school but under a different name - it's called rounding! If you take a floating point (decimal) number such as 3.14159 and round it to 3, you just quantized it to a whole number (integer). That is very helpful to LLM performance because 3 takes up less memory than 3.14159 and also requires less computation effort than floating point (decimal) calculations. Especially for matrix calculations, although that was a high school Algebra 2 topic, it's a very important concept in machine learning. But as I'm sure you are pointing out, a model that uses quantization or rounding, is going to be less accurate, which is the key trade off.
Another way to look at the quantization compression technique used in LLMs is to relate it to another application of quantization we are all very familiar with - JPEG image compression. Compressing a JPEG image works by reducing the number of bits used to represent each pixel in an image. This reduces the file size and download speed of the image, but also reduces its visual quality. Bottom line, more compression you get faster downloads and responses, but at the cost of quality.

So what is the deal with the quantization alphabet soup seen in model variant names? q, K, L, M, 0, 1, S?
It's quite simple when you have the naming convention decoder:
-
Standard Quantization: qX_# where X is the bit level and # is 0 for basic, 1 for improved accuracy
-
Basic K-Quantization: qX_K where X is the bit level
-
Advanced K-Quantization: qX_K_Y where X is the bit level and Y is L, M, or S for Large, Medium, Small compression levels with Small meaning the smallest model size and heavily compressed
If you would like to go deeper on quantization, I recommend checking out the Hugging Face Quantization Guide. It is a great resource for understanding the different quantization techniques and their trade-offs.
Selecting the Right Model for You
Now that you know the basics of model sizes, quantization, and the different model variants, it is time to select the right model for your needs. A great resource to consider is the EvalPlus Leaderboard, which provides a comprehensive list of coding models along with their performance metrics for its benchmark test, it runs all models through.
Using the leaderboard, I selected the Qwen2.5-Coder model. That model is available Ollama here and has a ridiculous number of 196 variants available. Not a problem, based on the previous sections, we now know how to understand how each variant is different and the pros and cons.
As I shared earlier, I like to run one model for both code completion and chat to maximize my memory utilization, so I selected the qwen2.5-coder 3b-instruct-fp16 variant. That means it has a total of 3 billion parameters and is optimized for instruction-based tasks with FP16 precision. The instruct model is generally better for chat and it requires 6.2GB of RAM with no quantization (compression that reduces quality). For my setup (M2 Pro 32 GB RAM) this was a great compromise between memory usage, speed, and quality.
Setting up the Ollama Engine
To run our AI model locally, we need an engine that will operate the model and expose the capabilities via an API to other apps on our system, such as the VS Code extension, we will use later. To accomplish this, we will use the cross-platform open-source tool called Ollama.
Manual Download and Installation
-
Head over to the Ollama download page and get the zip file for macOS.
-
Once downloaded, extract the zip file and drag
ollama.appto your Applications directory.
Automated Download and Installation with Homebrew
If you have Homebrew installed on your system, you can use it to automate the download and installation of the Ollama engine. Here’s how you can do it:
Open up Terminal and run: brew install --cask ollama
steve@tweaks ~ % brew install --cask ollama
==> Downloading https://formulae.brew.sh/api/cask.jws.json
==> Downloading https://github.com/ollama/ollama/releases/download/v0.5.13/Ollama-darwin.zip
==> Downloading from https://objects.githubusercontent.com/github-production-release-asset-2e65be/658928958/2dc24c17-0bc0-487a-92d1-0265efd65a14?X-Amz-Al
################################################################################################################################################## 100.0%
==> Installing Cask ollama
==> Moving App 'Ollama.app' to '/Applications/Ollama.app'
==> Linking Binary 'ollama' to '/opt/homebrew/bin/ollama'
🍺  ollama was successfully installed!
Start up Ollama and Setup the Command Line Interface
-
Go to your Applications directory, and run Ollama.
-
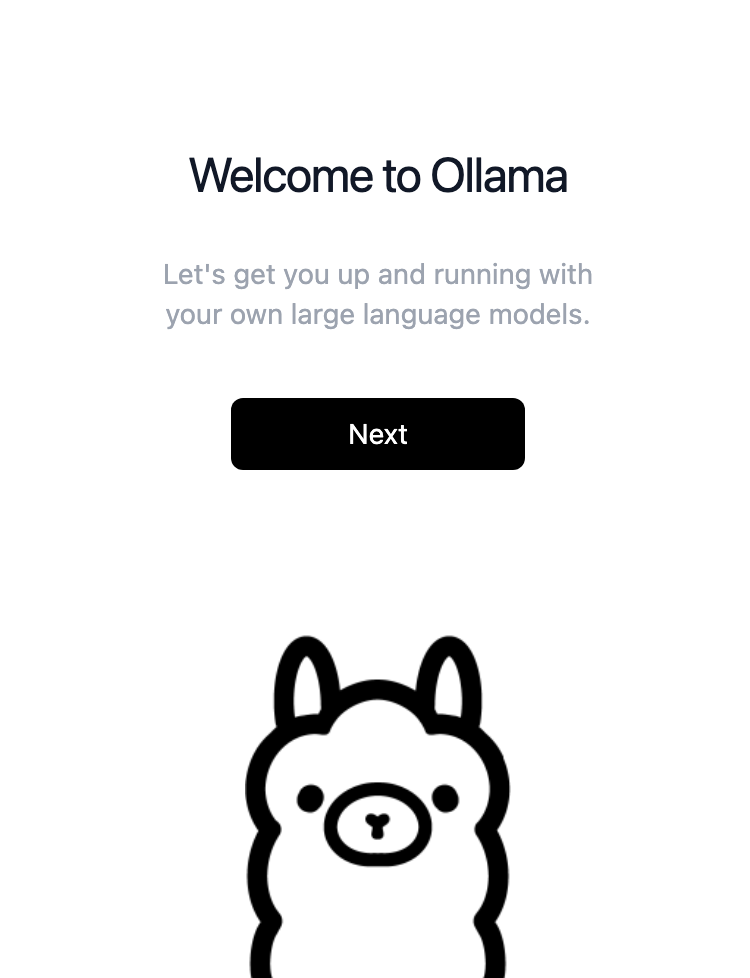
Hit
Nexton the Welcome screen.
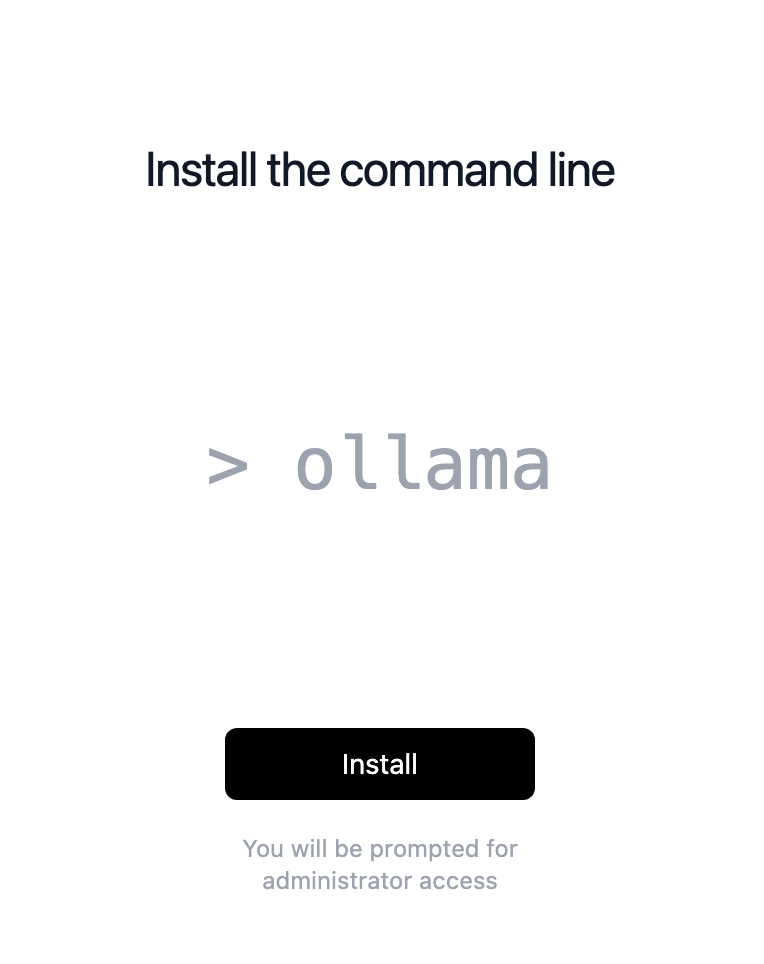
- Hit
Installto Install the command line interface (admin rights required).
-
Enter your admin password when prompted.
-
Click
Finish.
No user interface will display, but you will see a small llama icon in the top menu bar.

Downloading and Installing a Model
No matter how you installed Ollama, the process of downloading and installing a model is the same. Let's start by navigating to the Ollama website, find the model you want using the search page, and then run the installation command provided on the page at a Terminal prompt:
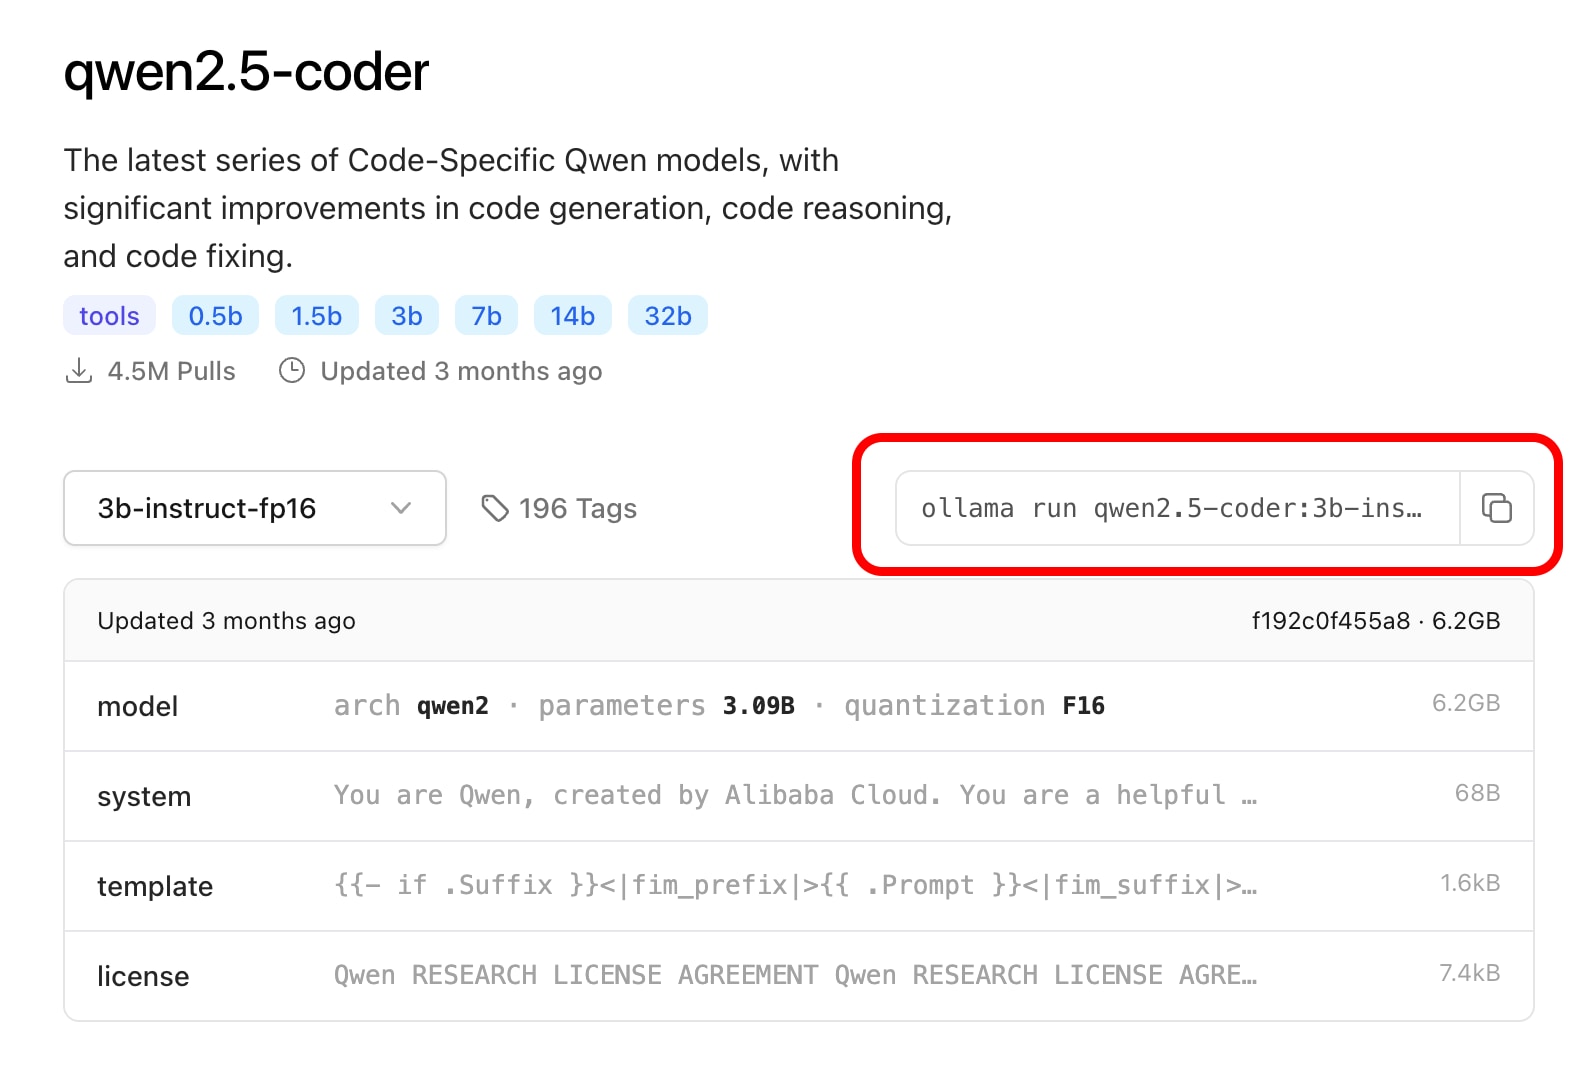
Below is the command for the model we are using in this article:
steve@tweaks ~ % ollama run qwen2.5-coder:3b-instruct-fp16
pulling manifest
pulling b293d7aa8e63... 100% ▕█████████████████████████████████████████████████████████████████████████████████████████▏ 6.2 GB
pulling 66b9ea09bd5b... 100% ▕█████████████████████████████████████████████████████████████████████████████████████████▏   68 B
pulling e94a8ecb9327... 100% ▕█████████████████████████████████████████████████████████████████████████████████████████▏ 1.6 KB
pulling 45fc3ea7579a... 100% ▕█████████████████████████████████████████████████████████████████████████████████████████▏ 7.4 KB
pulling a6236e77c2f1... 100% ▕█████████████████████████████████████████████████████████████████████████████████████████▏  484 B
verifying sha256 digest
writing manifest
success
>>> Send a message (/? for help)
The model will download, unpack, and automatically start up running in your interactive terminal session. If you close terminal or restart the machine, you'll need to run ollama run qwen2.5-coder:3b-instruct-fp16 again to start it back up. But the download and unpacking will only happen once.
At this point, feel free to have some fun with the prompt! You can use the /? command to see a list of available commands and options.
>>> Hello, can you help me write better java code?
Of course! I'd be happy to help improve your Java code. Please provide the
code snippet you're working with, and let's go through it together to
identify any areas for improvement.

>>> Send a message (/? for help)
While it is possible to configure running Ollama in the background, and I will cover how to set that up in a future article, for now we have configured Ollama to run in the foreground so we can easily start and stop it when we are not using it. You will want to stop Ollama when you are done working on your projects to free up system resources.
To close and unload Ollama, simply type /bye or hit:
Control + D
Setting up VS Code with Continue Extension
Now that we have our LLM running, we need to hook up Visual Studio Code so we can use our LLM for code completion, generation, refactoring, and chat. To do that, we must install an extension that will talk to Ollama (running in the Terminal session we started earlier) via its api running on http://localhost:11434.
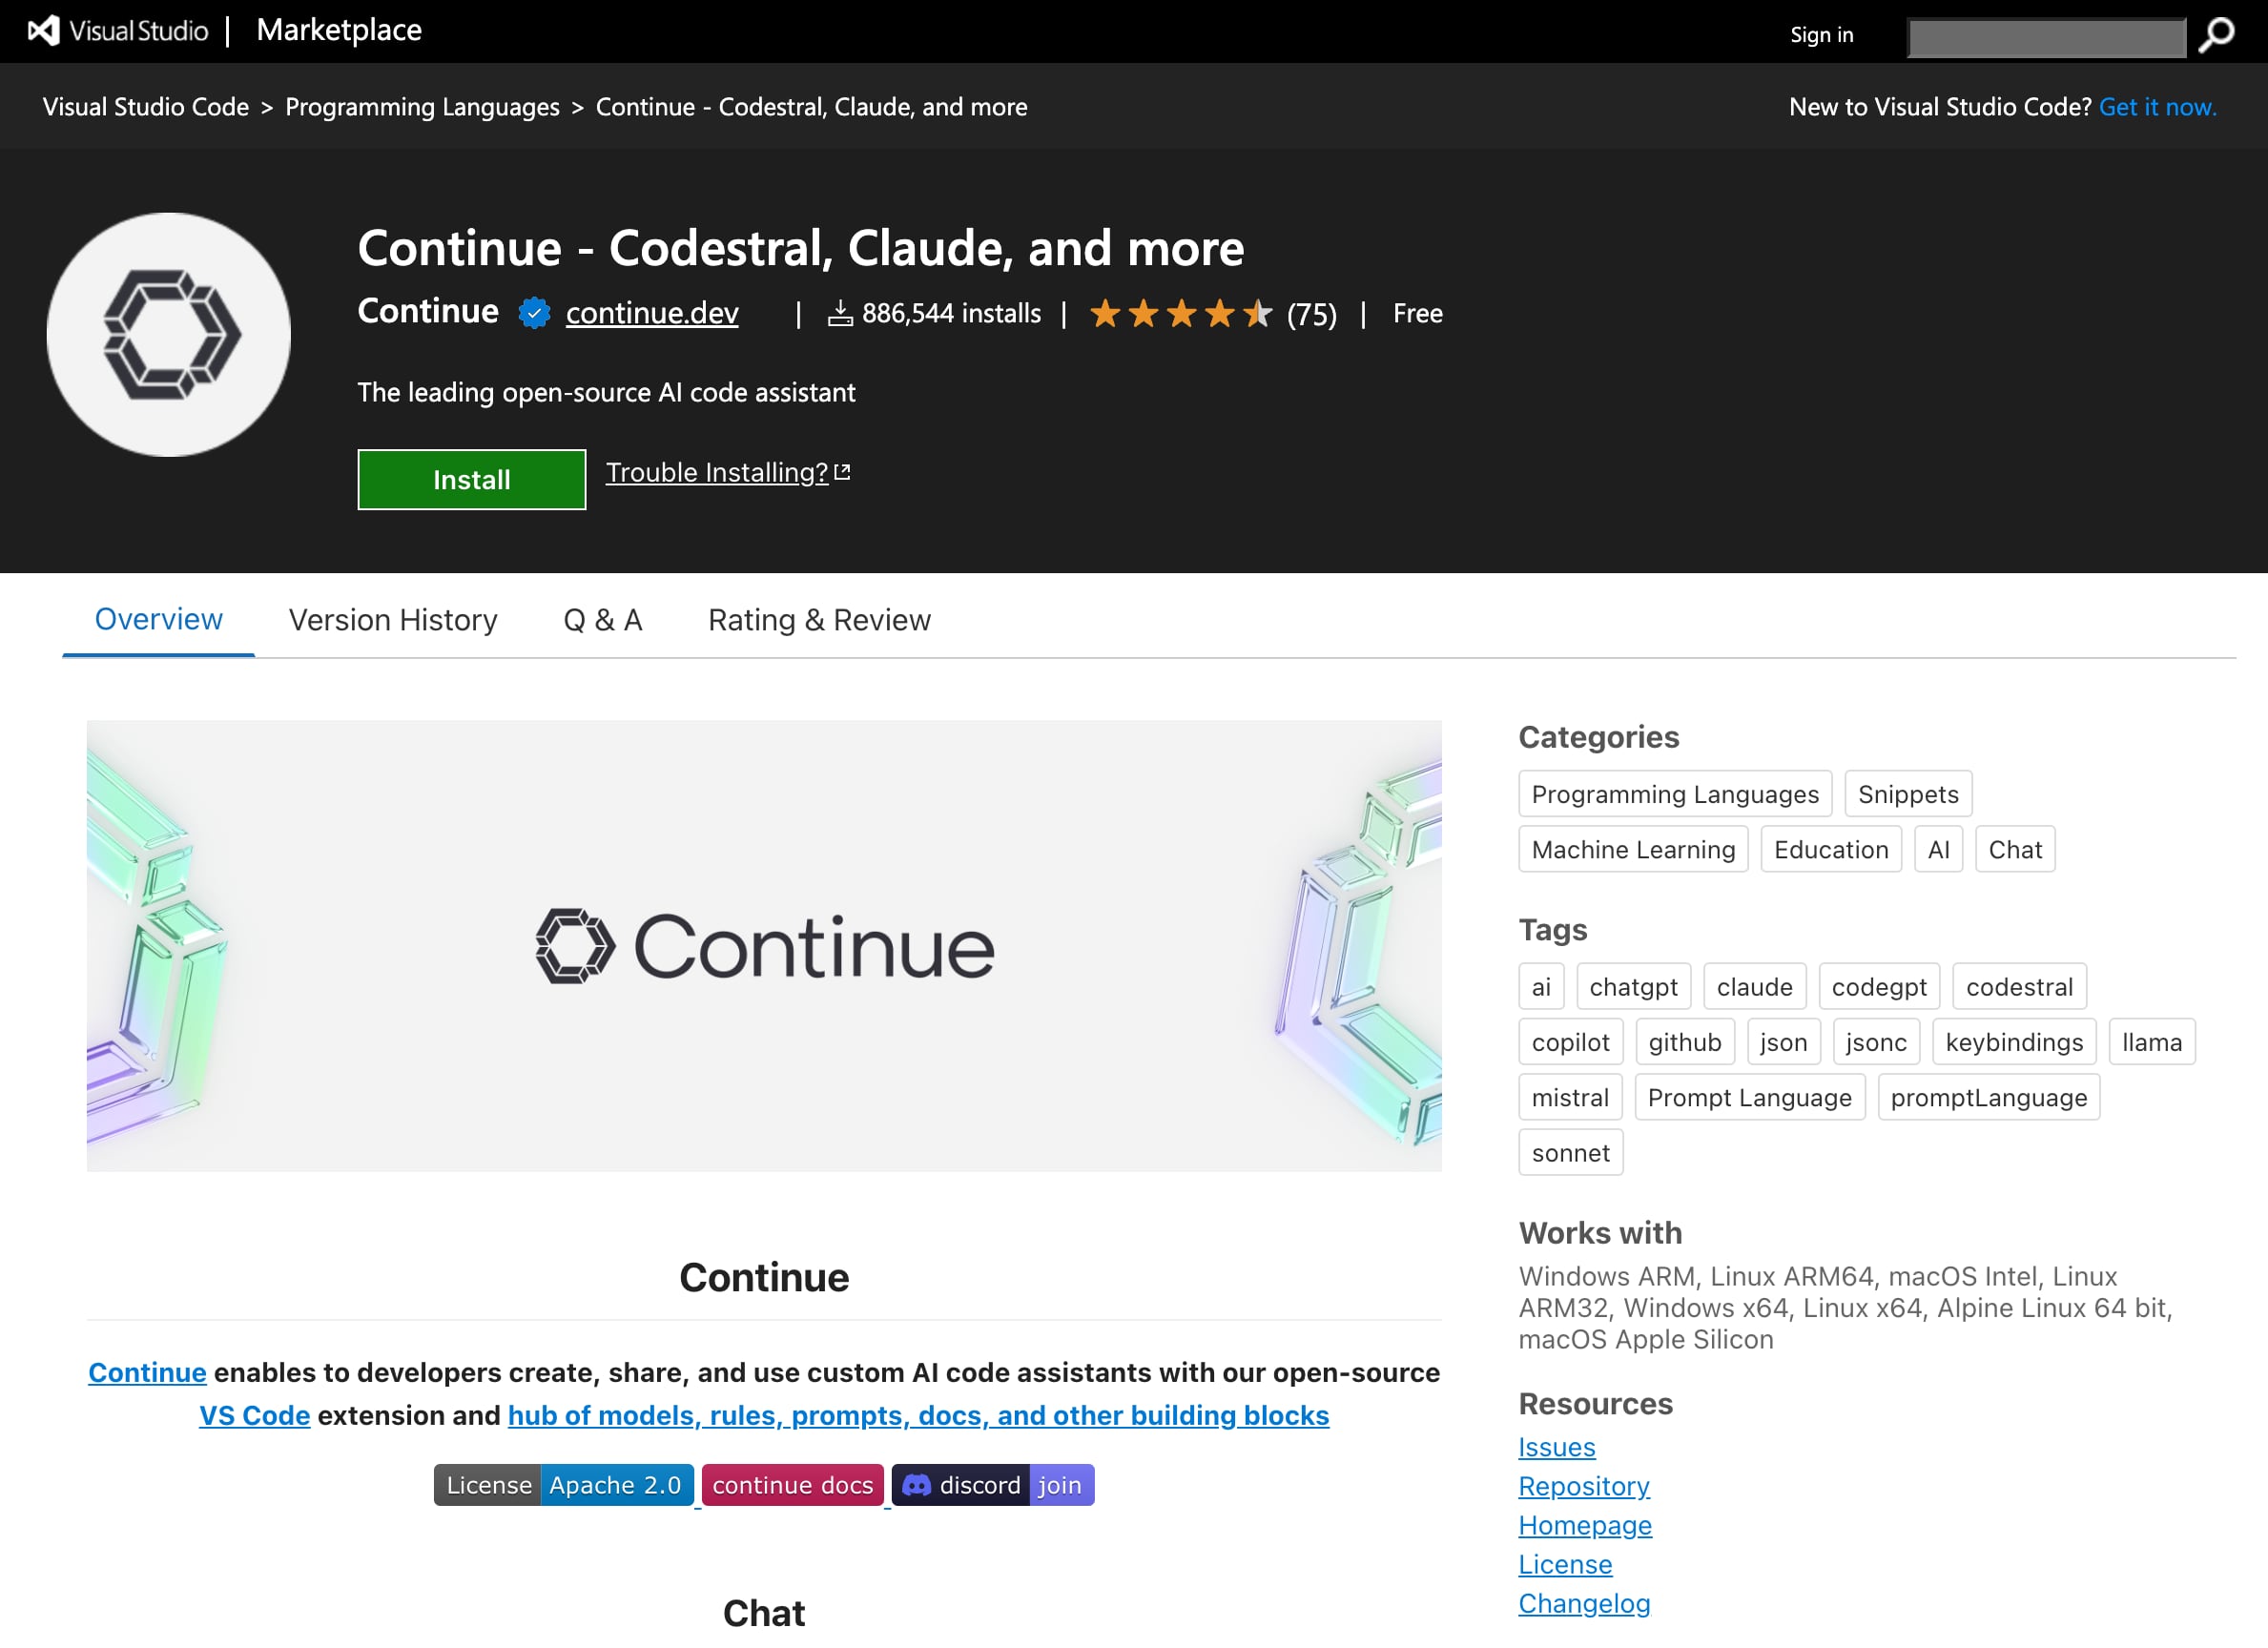
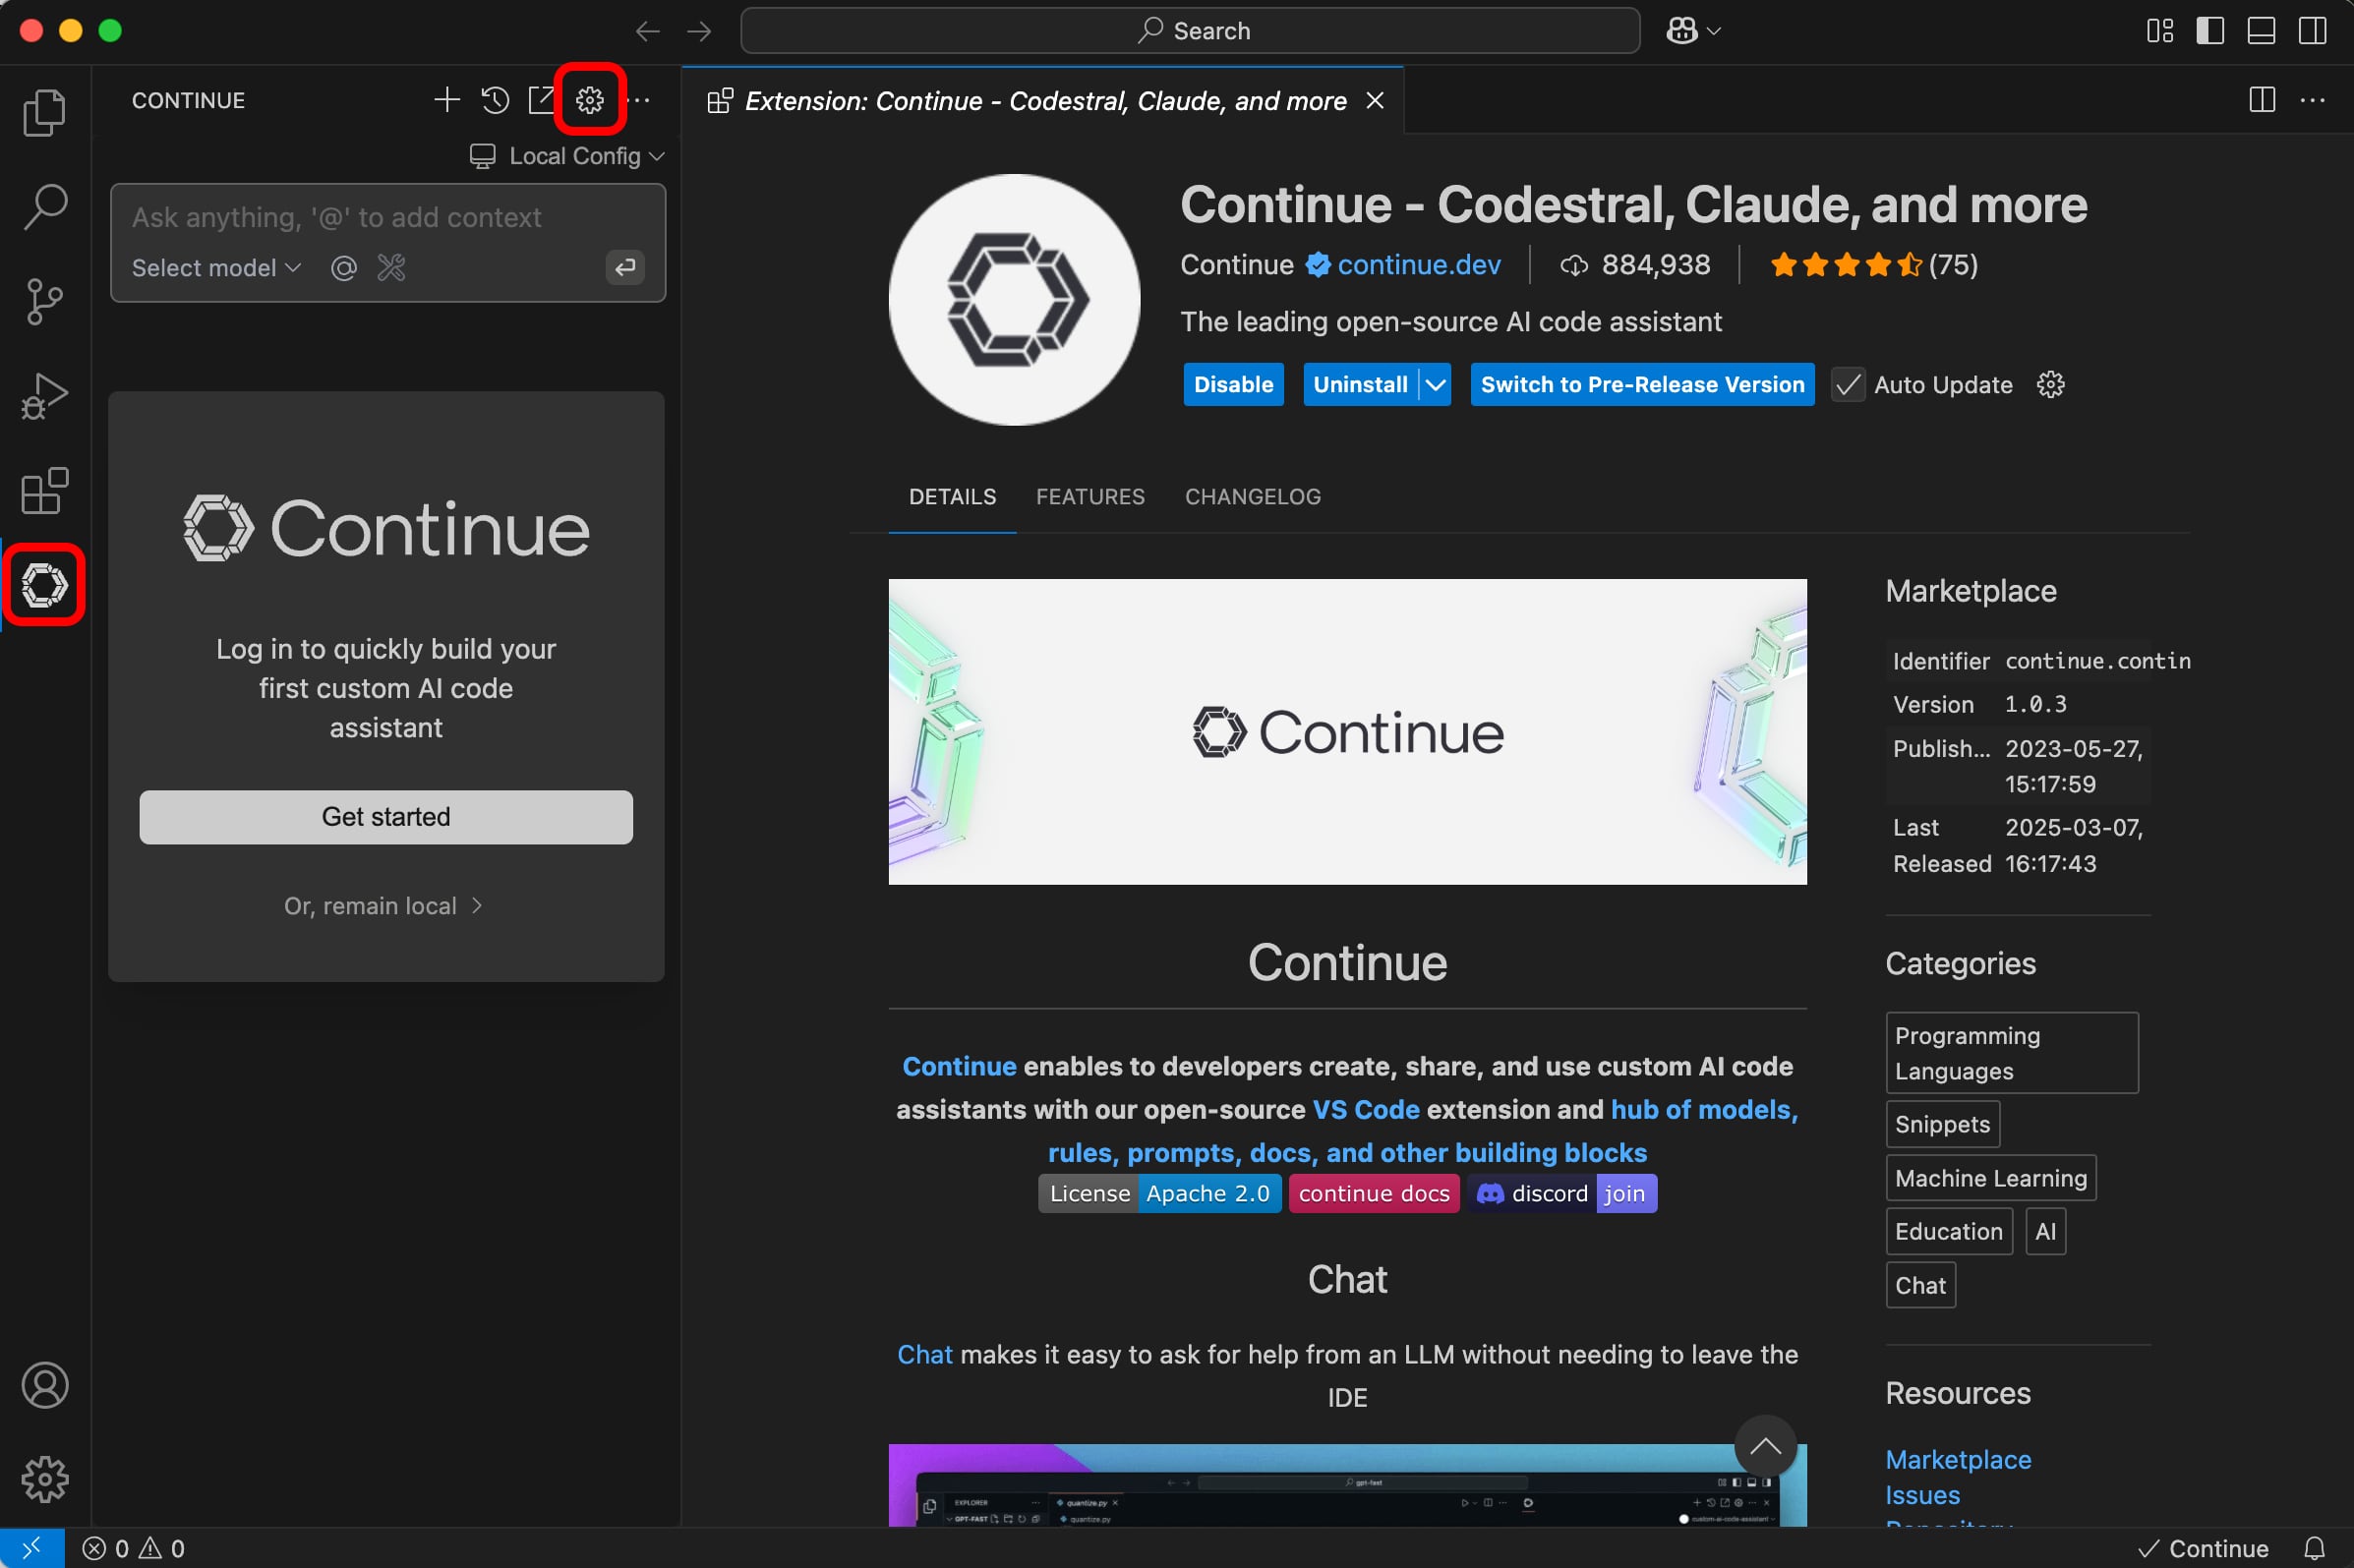
For this article we are going to use the popular extension called [Continue(https://github.com/continuedev/continue)] which is an open-source extension available for both VS Code and JetBrains IDE. Not to be confused with the full service available at continue.dev, the extension can be used with Ollama directly without having to subscribe to anything.
To install the Continue extension in VS Code, follow these steps:
- Visit the Visual Studio Marketplace page for the Continue extension and hit the green
Installbutton and subsequentlyContinueorAllowon any confirmation windows to allow the website to open Visual Studio Code.
-
The Continue extension page will be shown in VS Code, click
Installagain, followed byTrust Publisher & Installto complete the process. -
Click on the Continue icon on the left sidebar of VS Code followed by the Gear icon.
- Under the Configuration section, click on
Open Config Fileto load the config.json file.
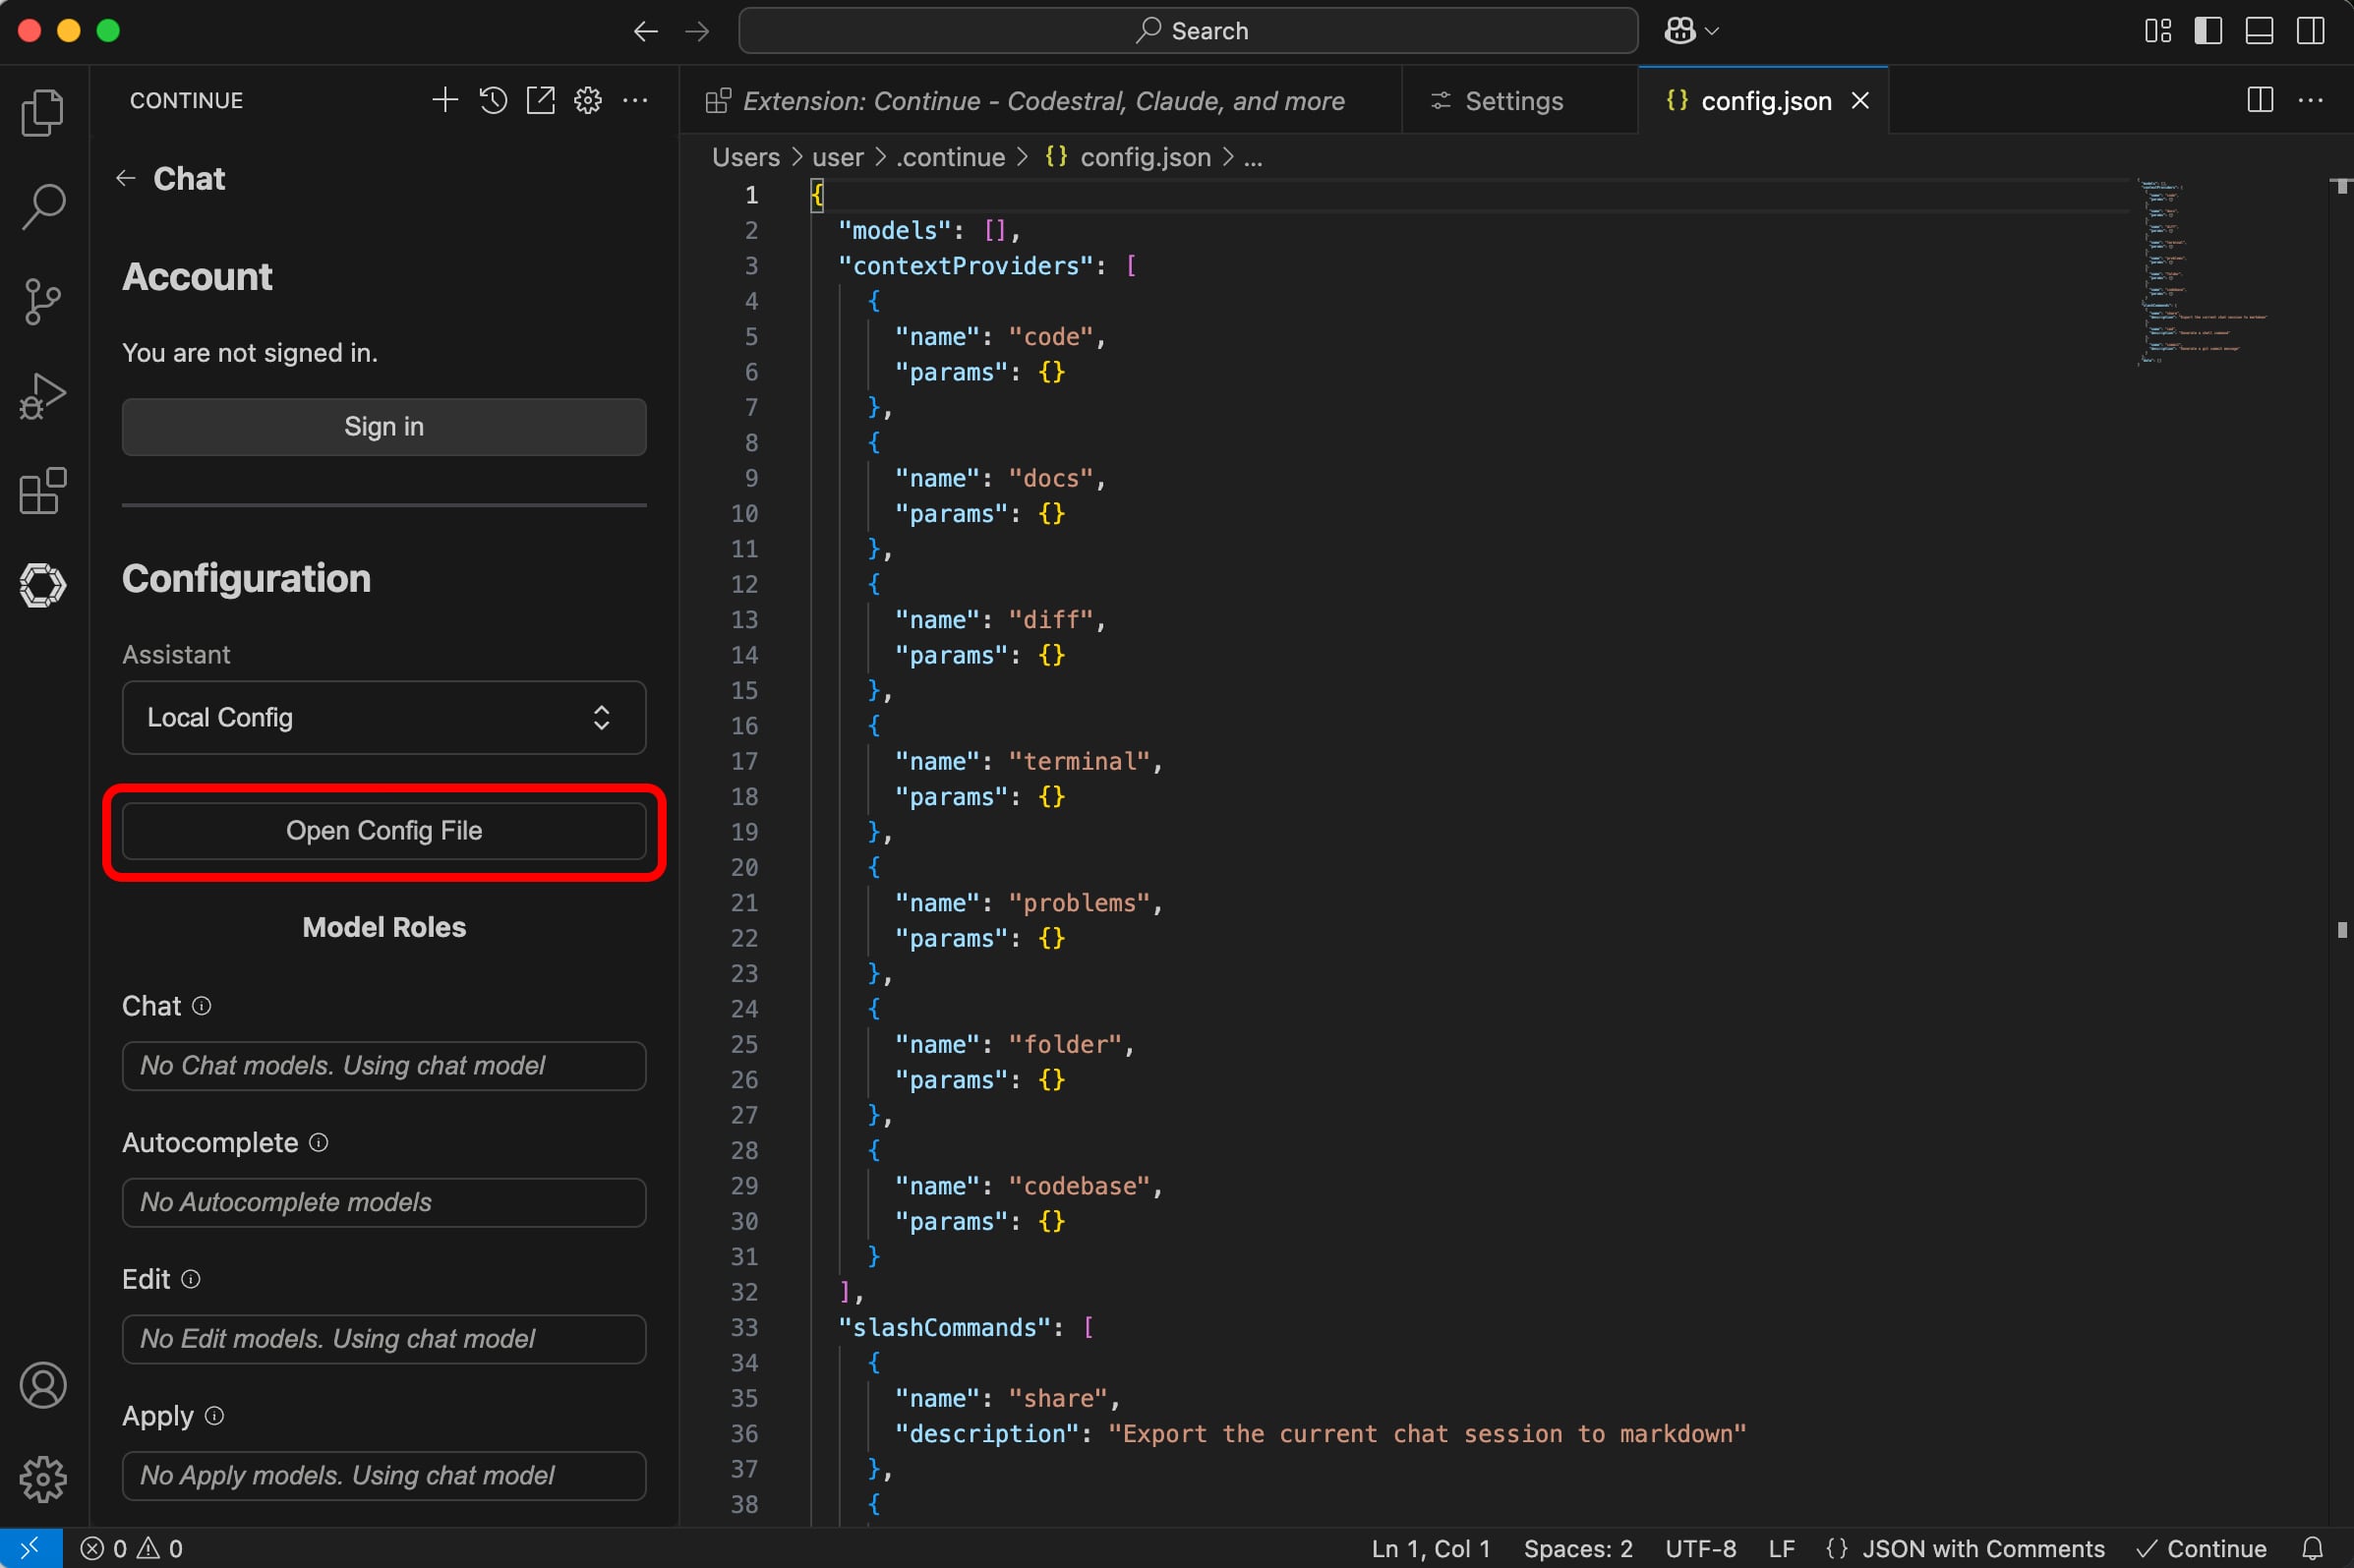
- Now we need to add our Ollama model details in the
modelsJSON object and a newtabAutocompleteModelobject to theconfig.jsonfile. Notice we are going to use the name of the model that we used in the Ollama run commandqwen2.5-coder:3b-instruct-fp16or whatever model you have chosen to use. To make it easier, the entire JSON object below can be copied and pasted to replace the entire config.json file, just remember to update the name of the objects with your model name if you are using a different model.
{
  "models": [
    {
      "model": "qwen2.5-coder:3b-instruct-fp16",
      "provider": "ollama",
      "title": "qwen2.5-coder:3b-instruct-fp16",
      "apiBase": "http://localhost:11434"
    }
  ],
  "tabAutocompleteModel": {
    "title": "qwen2.5-coder:3b-instruct-fp16",
    "provider": "ollama",
    "model": "qwen2.5-coder:3b-instruct-fp16",
    "apiBase": "http://localhost:11434"
  },
  "contextProviders": [
    {
      "name": "code",
      "params": {}
    },
    {
      "name": "docs",
      "params": {}
    },
    {
      "name": "diff",
      "params": {}
    },
    {
      "name": "terminal",
      "params": {}
    },
    {
      "name": "problems",
      "params": {}
    },
    {
      "name": "folder",
      "params": {}
    },
    {
      "name": "codebase",
      "params": {}
    }
  ],
  "slashCommands": [
    {
      "name": "share",
      "description": "Export the current chat session to markdown"
    },
    {
      "name": "cmd",
      "description": "Generate a shell command"
    },
    {
      "name": "commit",
      "description": "Generate a git commit message"
    }
  ],
  "data": []
}
When you are finished with the edits, simply save the new configuration by hitting Control + S. Continue will automatically reload its configuration, and the new models should be recognized in the Chat, Autocomplete, Edit and Apply boxes shown below:
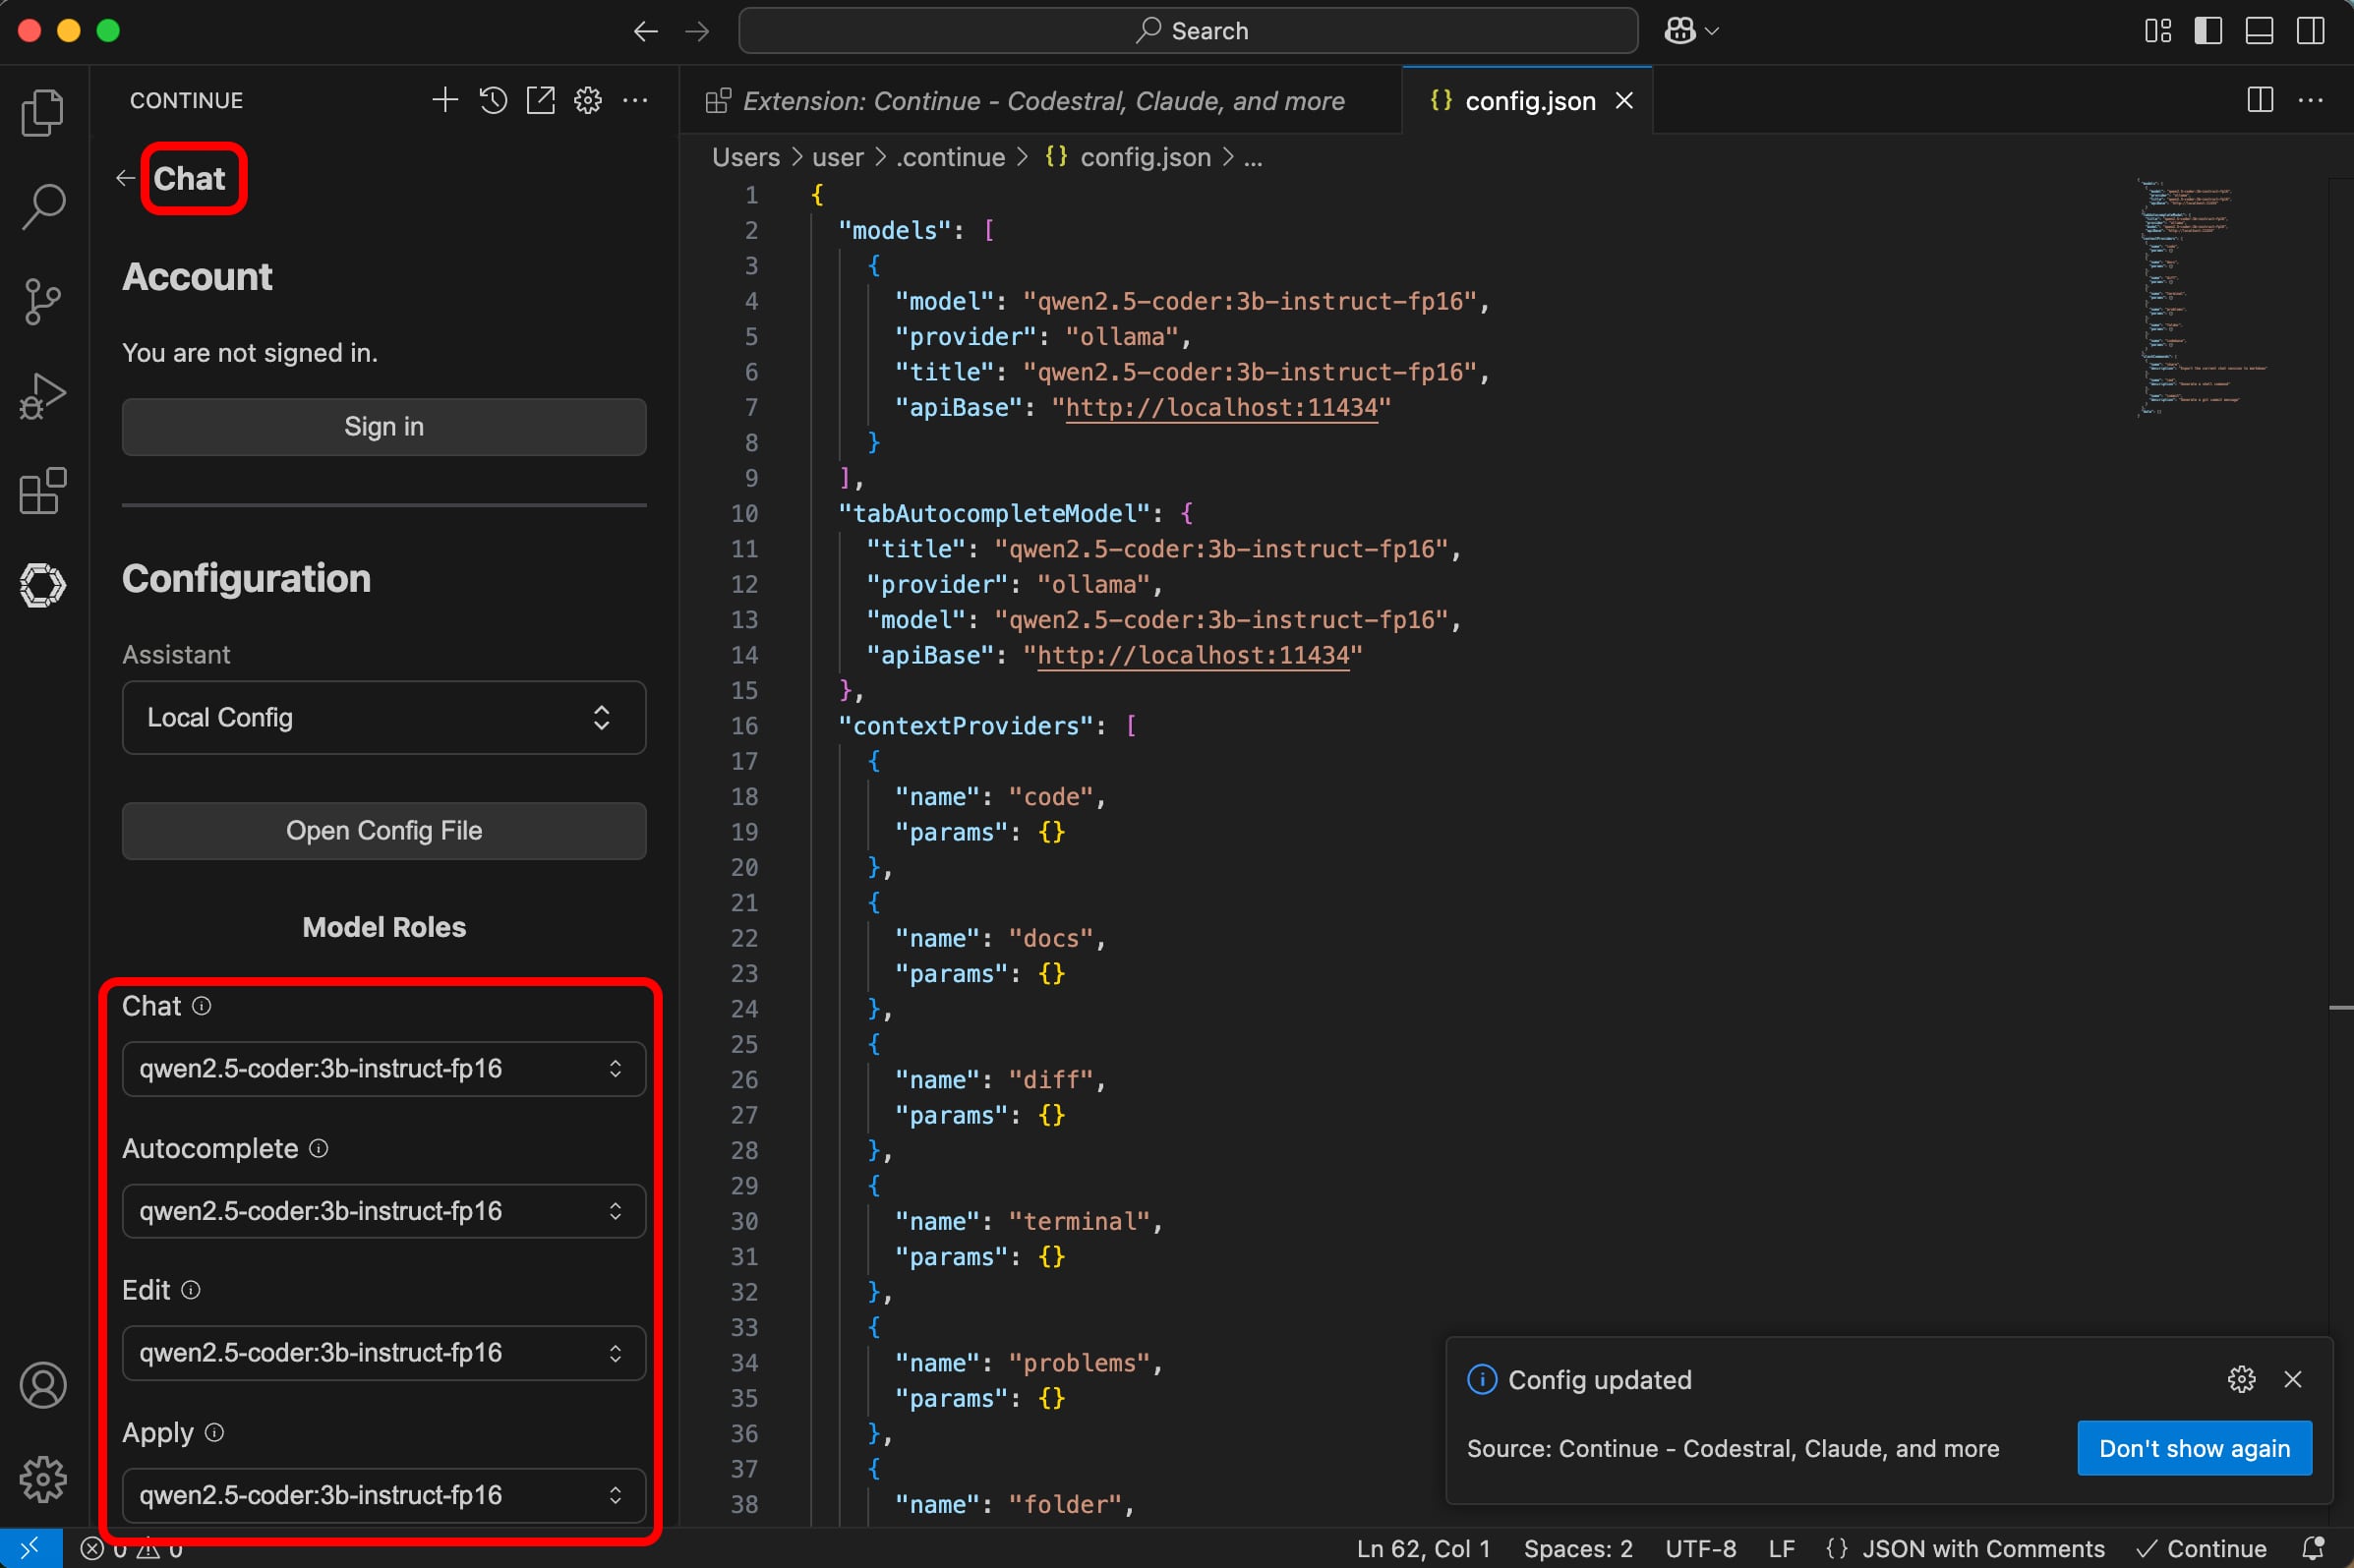
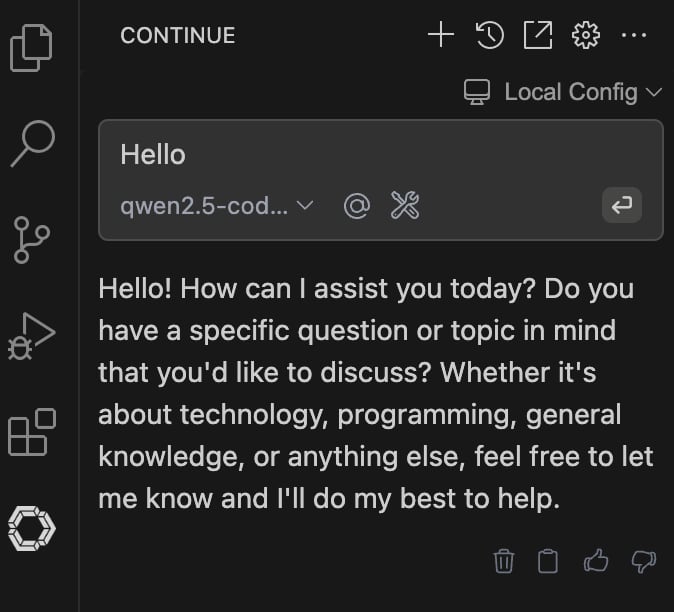
As a final step, click on the Chat header shown above to return to the chat box and say hello.
Tips and Tricks Using the Continue extension
-
You may want the Continue extension chat area on the right side of VS Code to make it more like the Github Copilot experience. To do that, just drag the Continue icon from the left side menu over to the right side of VS Code and release.
-
Code completion will automatically start working as you type your code or add a comment. You simply simply hit
tabto accept the code suggestions. -
You can add context and references to the chat box by clicking the @ symbol.
-
Selecting code and hitting
Command + Lis a great way to add a reference to the chat box to ask a question. -
Selecting the code and hitting
Command + Istarts edit mode where you can make a request to refactor or fix code. -
You can cancel a request by hitting
Command + Backspacewhich is useful if a request is taking too long or you changed your mind.
Troubleshooting
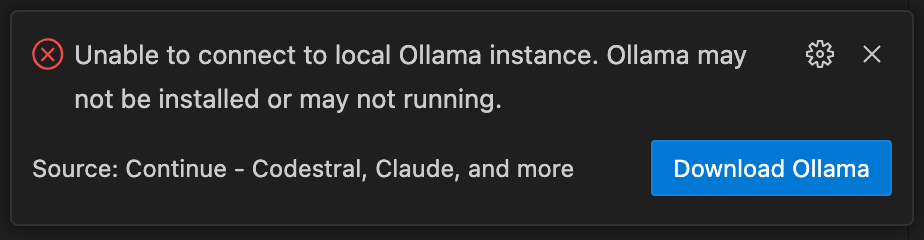
If you experience an error with Continue indicating it is unable to connect to the local Ollama instance, head over to Terminal and make sure your instance of Ollama is still running. Just run ollama run qwen2.5-coder:3b-instruct-fp16 again to start it back up (be sure to replace the model name with the one you are using).
Poor Response Time?
Try running a smaller model variant such as:
qwen2.5-coder:3b-instruct-q4_K_Mfor the 3b parameter variant with q4_K_M quantization (Same size model but with compression to make it faster).qwen2.5-coder:1.5b-instruct-fp16for the 1.5b parameter variant with fp16 precision (Smaller model with high precision).qwen2.5-coder:1.5b-instructfor the 1.5b parameter variant with q4_K_M quantization (Smaller model with compression which is the fastest)
Congratulations
You made it to the end of this very long guide where we covered the hardware requirements, the different types of models and how to select them, along with how to bring it all together with Ollama and Continue. I hope you found this article helpful as you explore the world of AI-assisted development. Happy coding!